Before starting the build, the KAON R&D Prado was a little rough around the edges. It sat in the corner of our carpark for years, rarely driven except to road-test a new product or to capture media. A true workhorse, it had one role – help our team develop products quickly. And boy, did it do that job well.
The Prado was originally purchased by KAON Founder, Tin, in 2014. Taking a punt, he acquired the 4-year-old ex-mining vehicle sight unseen from an auction. With fond childhood memories of beach four-wheel driving in the back of an old 60 series, the original intention for the Prado was simple: take the family on beach camping trips.
As an engineer and a tinkerer, it wasn't long before Tin started on a few DIY mods, first tackling a set of Trans Cooler mounting brackets, a Cargo Barrier, and a Step Ladder – all of which would later go on to become KAON's first products. After joining the Toyota LandCruiser Club, it wasn't long before Tin and the family went from nice, comfortable beach camping to bigger, bucket-list trips. That's when the big mods, and KAON's journey, really began.
These days, Tin and the family tour in their beloved FJ Cruiser. But before the FJ arrived in late 2017, the Prado took them to Cape York, across the Simpson, and to many 4WD destinations up and down the East Coast of Australia.
While the FJ took over as the touring vehicle, the Prado transitioned to a new role: R&D Guinea Pig. Since retiring from travel in 2017, the Prado has been the foundational research, development and testing ground for hundreds of products.
.jpg)
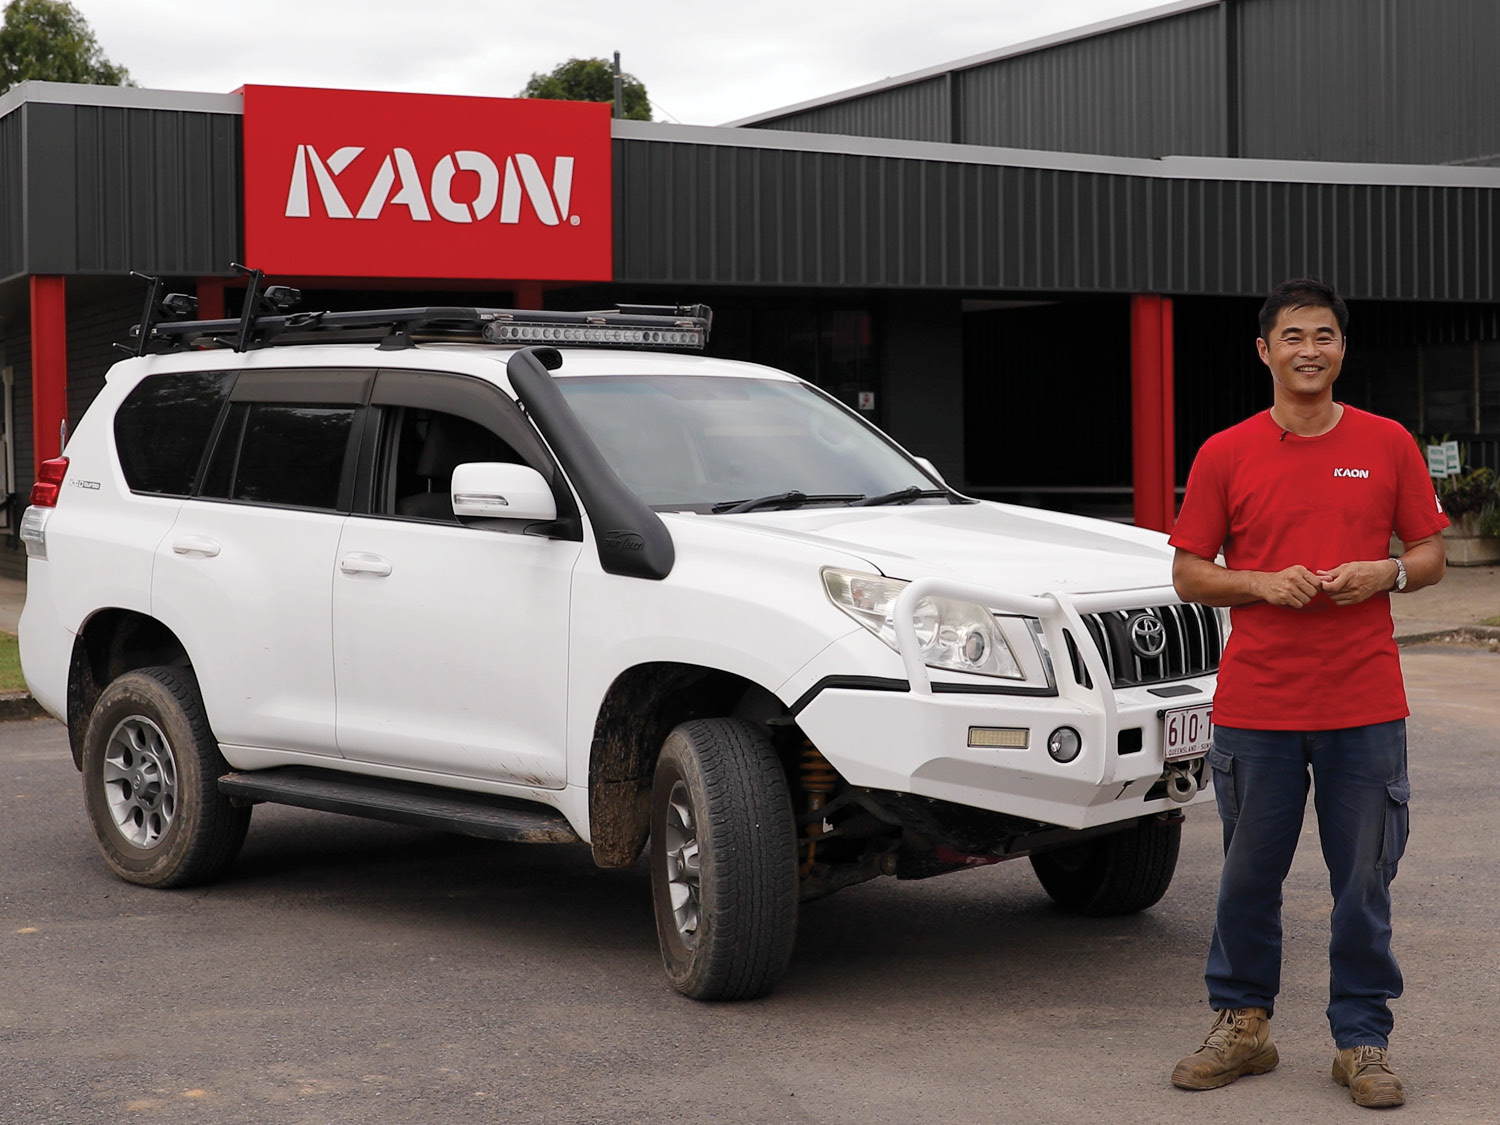
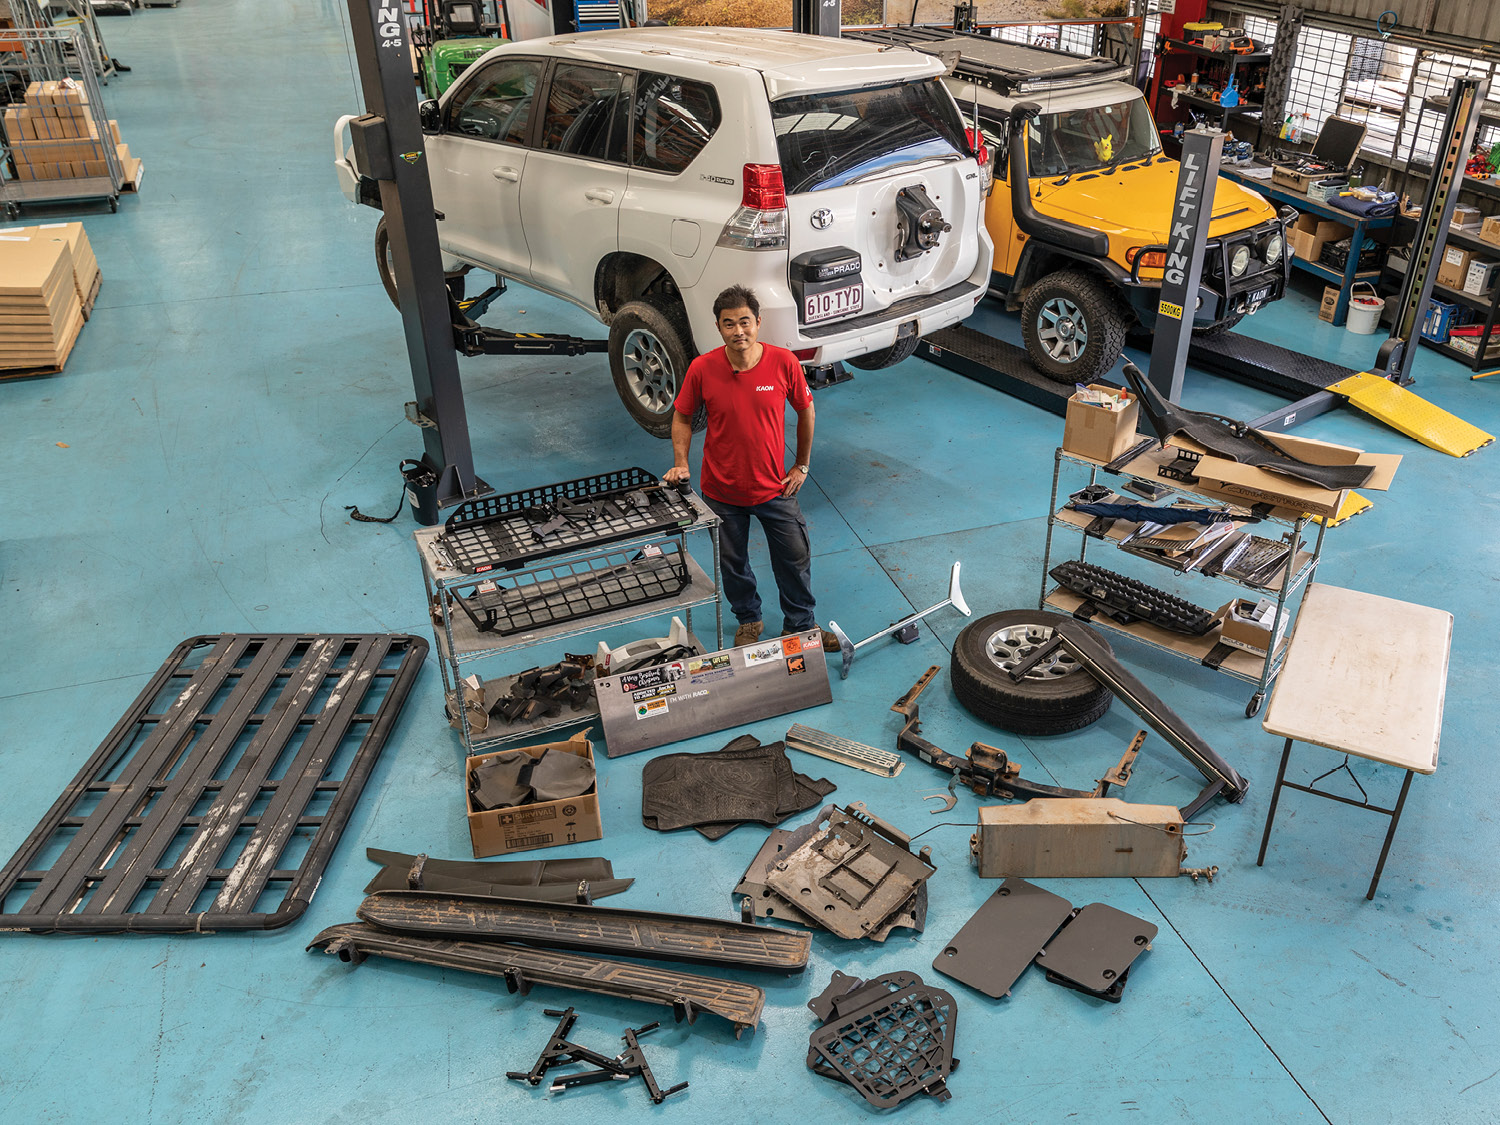
But years of being the MVP of the KAON team took their toll on the Prado. The exterior was scuffed and scratched, and the paint dull and contaminated. Accessories begun to peel out in the elements. The interior trim was littered with holes from test-fitting products, the rejected remains of which lay discarded throughout the car. The 150 was solid, structurally sound and reliable, but it desperately needed some love.
Tin put it best: the Prado felt "mopey."
With a goal to attend more interstate shows in 2024, we needed a vehicle to make it happen. But we wanted to do it differently to others: to build an approachable, second-hand tourer, something to sit apart from the big, extravagant builds that have taken over the show scene. Something our community could genuinely relate to, but with a little KAON flair. Our focus shifted to the one vehicle that made sense. It was time to breathe new life into this humble, reliable, and enduring family car to which KAON owes its foundation.
IN THIS BLOG
We'll cover the entire build:
Back to a Blank Slate
Roof Rack & Accessories
Interior Cargo & Rear Door
Exterior Out-Back
Water Storage
Everything Underneath
12 Volt & Electrical
The Result & What's Next
Back to a Blank Slate
With our sights set on rejuvenating the Prado, we needed to start with a proper teardown. We removed everything from the car, archiving first-edition products from KAON's early days, recycling unusable prototypes, and selling second-hand gear that still had life. The teardown process was a fun trip down memory lane: unearthing National Park Entry passes, crayons and colouring-in books, children's CDs, stickers from bucket-list trips, and other mementos from the Prado's early days as a family car.
With the teardown completed, it was time to give the car some TLC in the form of an overhaul detail, inside, outside and underneath. The vehicle soon returned looking better than ever, and we set to work replacing some interior trim pieces.
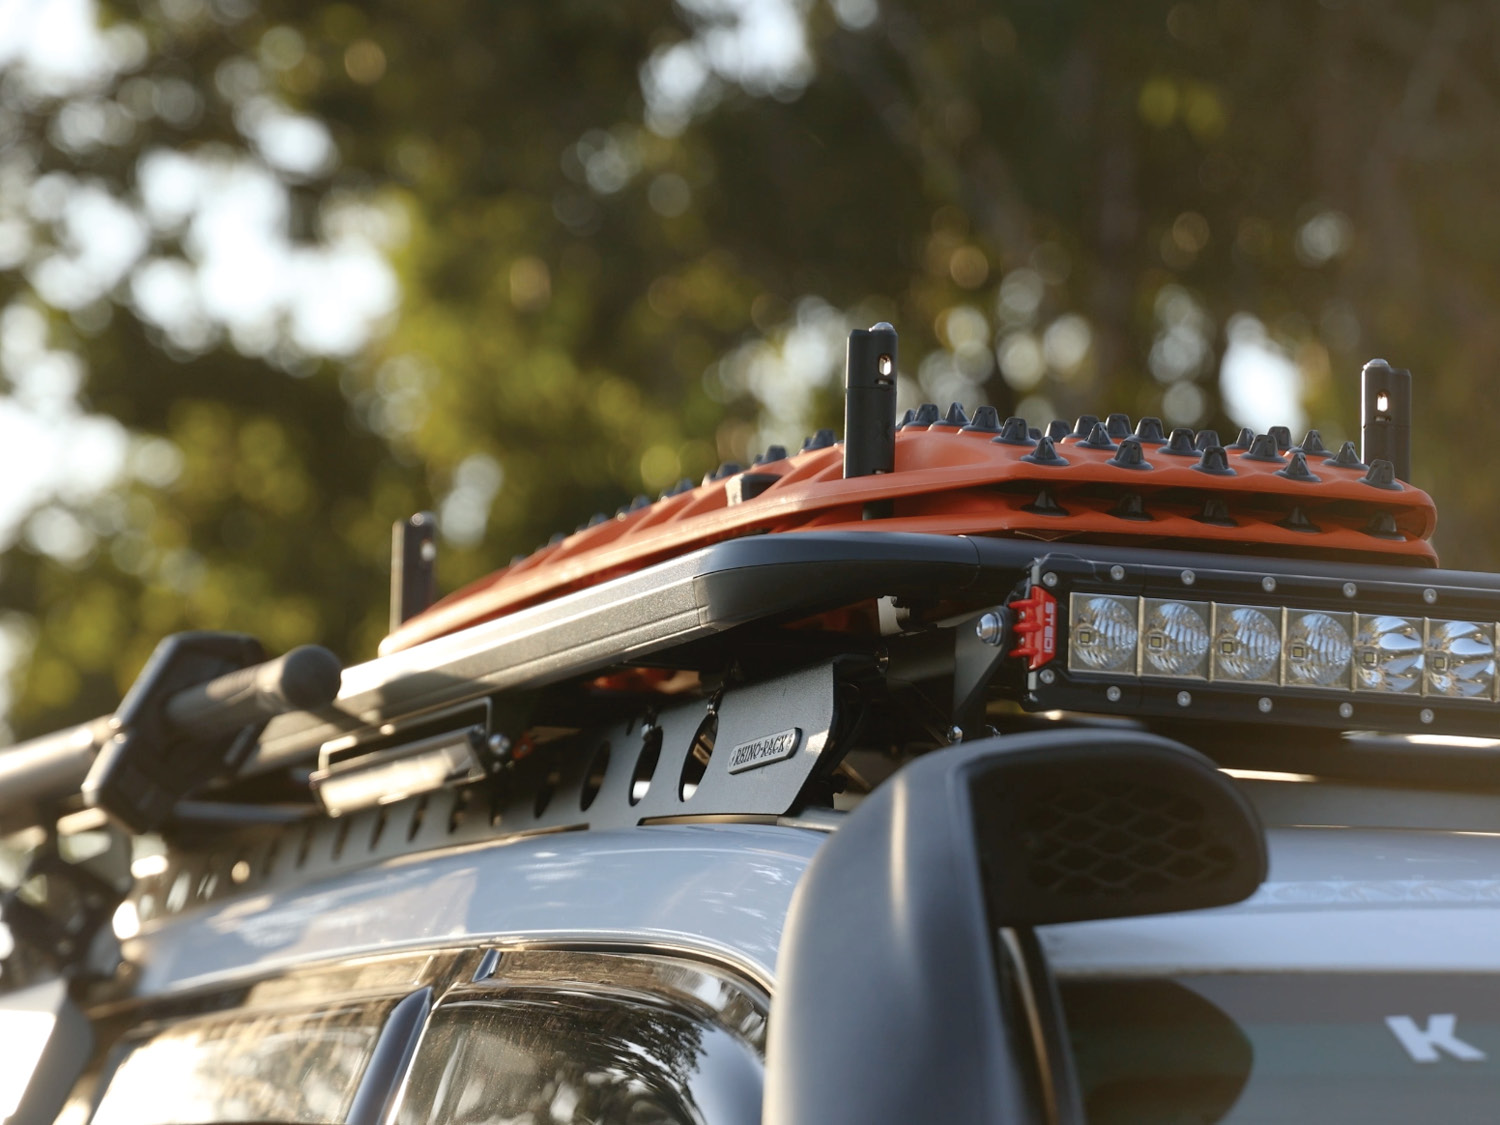
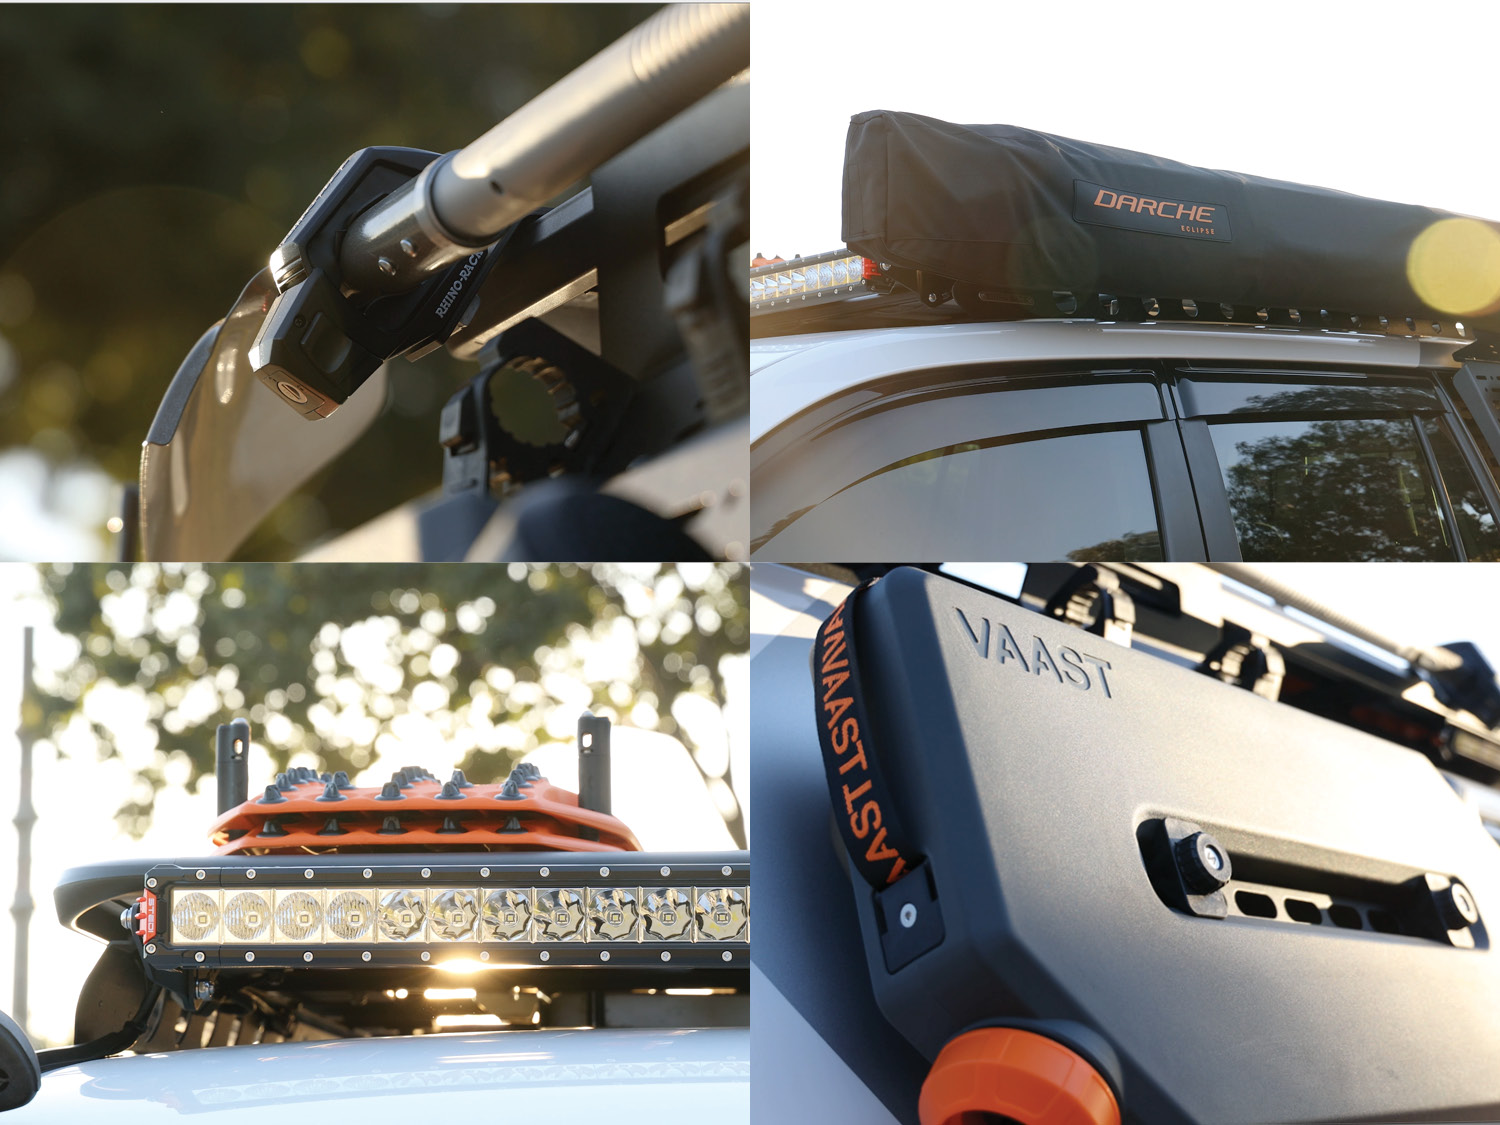
Starting at the Top: Roof Rack & Accessories
For us, a roof rack is a must-have when heading off-road, especially as we often carry bulky or dirty gear. We wanted a platform-style rack for the build, as they provide great flexibility and security. We selected the Rhino-Rack Pioneer 6 and Backbone mounting system because of its low weight, high strength, elegant design lines, and versatility.
Next, we added an awning, something Tin never personally had on the Prado – but many of our team have – and was keen to use. Tin's criteria were that it must be lightweight yet well-made, and short when packed so as to not extend too far past the Prado's 1900L rack. We also knew we needed it to be freestanding for easy setup and packdown. Ticking all the boxes was the Darche Eclipse, which also came with the added bonus of a forward-folding design for extra shade, and integrated LED lighting.
Other non-negotiables for us were self-recovery tools, including a set of rugged MAXTRAX XTREMEs with our Stealth Folding Mount and a good shovel secured with STOWiTs on our Shovel Holder.
As one of the early mods Tin made for himself in 2016, The Roof Rack Table Slide was something he missed on the FJ for many years, before we finally released it as a KAON product in 2022. Clearly, it needed to be added to the rack too.
For lighting, we added A STEDI Micro 13.9" Floor LED on each side for camp lights, while the ST3301 41" Light Bar was selected for its mid-range illumination – perfect for spotting wildlife on road shoulders.
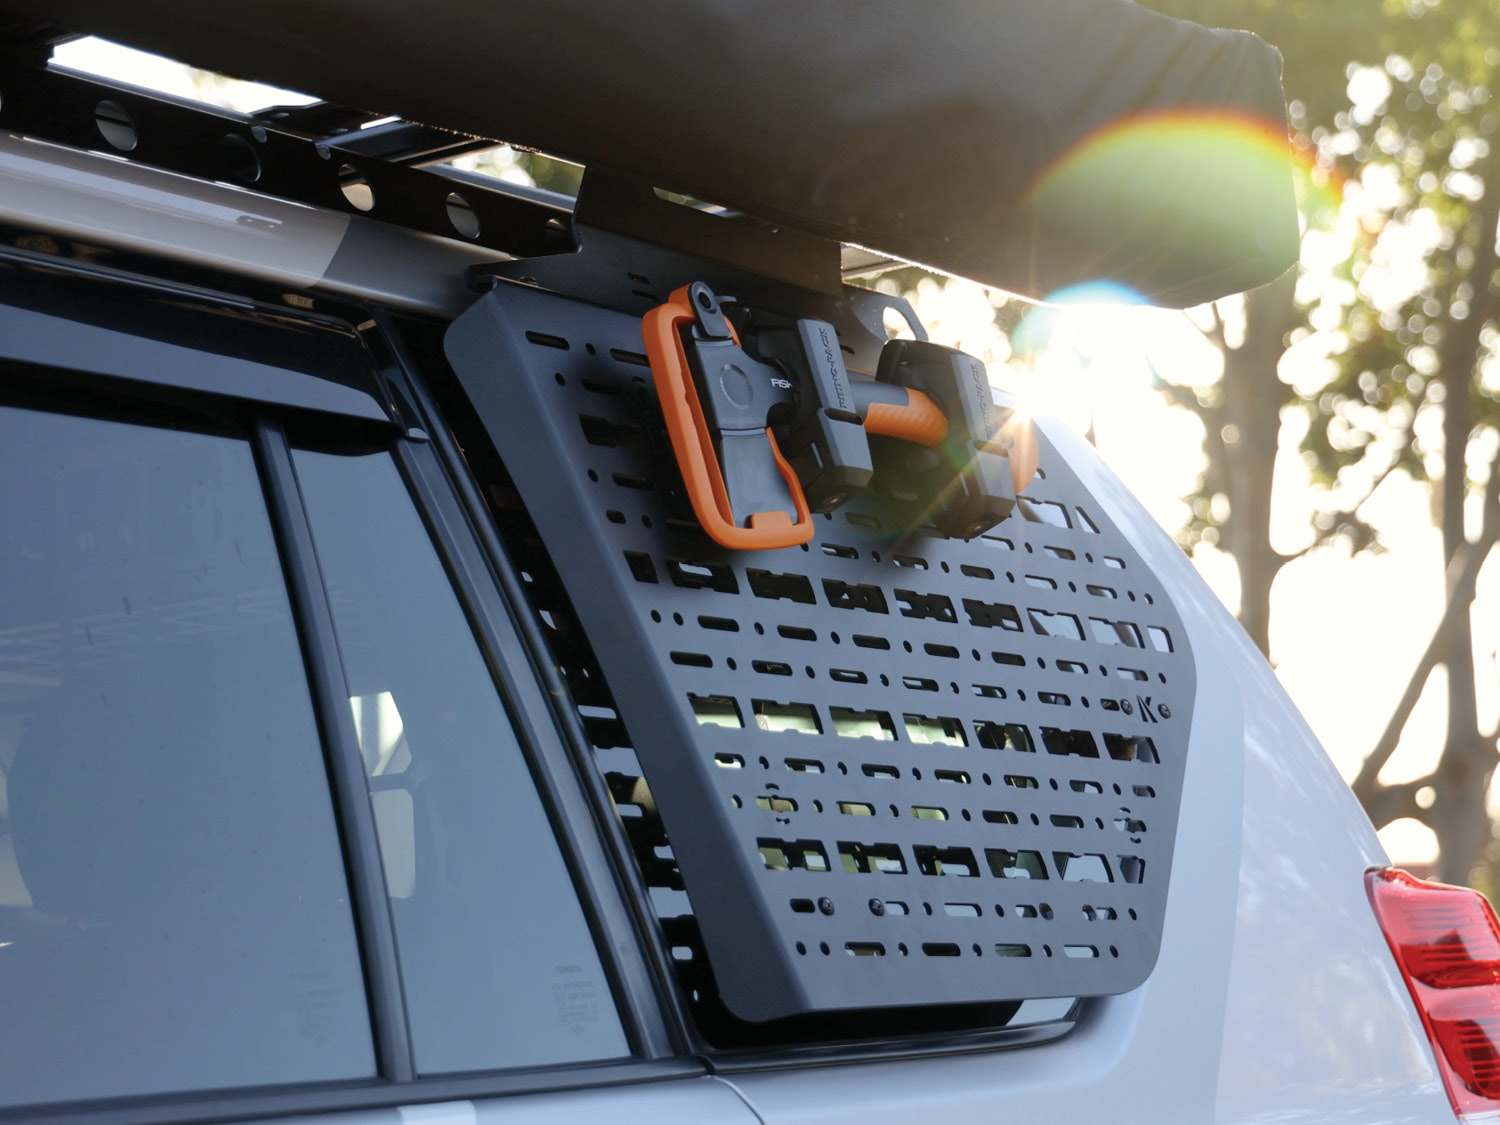
Last up was something new and totally experimental, a set of Exterior Side Window Panels. While these are a working prototype designed to only suit our specific rack configuration, these will allow us to extensively concept and market test the exterior windows as a mounting platform for accessories such as VAAST or Rotopax Water Tanks, Shovels, Axes, Pelican Cases or even Maxtrax Minis.
FEATURED ACCESSORIES
Rhino-Rack: Pioneer 6 with Backbone Mounting, STOWiT Utility Holder | Darche: Eclipse 270º Awning | MAXTRAX: XTREME Recovery Boards & Pins | STEDI: ST3301 Pro 41 Inch 28 LED Light Bar, Light Bar Mounting Bracket, Micro V2 13.9 Inch LED Flood Lights, Micro Roof Rack Bracket Bundle | KAON: Universal 270º Awning Brackets, Stealth Folding Maxtrax Mount, Shovel Mount, StarPort Starlink Mount, Roof Rack Table Slide
Solving the Storage Problem: Interior Cargo & Rear Door Living Space
With the roof rack sorted, it was time to turn our attention to another critical area: the rear cargo space.
Creating a functional space was one of our core requirements for the Prado build. We planned to use it for trips, shoots, and to attend 4x4 shows around the country, so the back would undoubtedly be loaded in various ways. Our most significant requirement was much the same as our customers: flexibility.
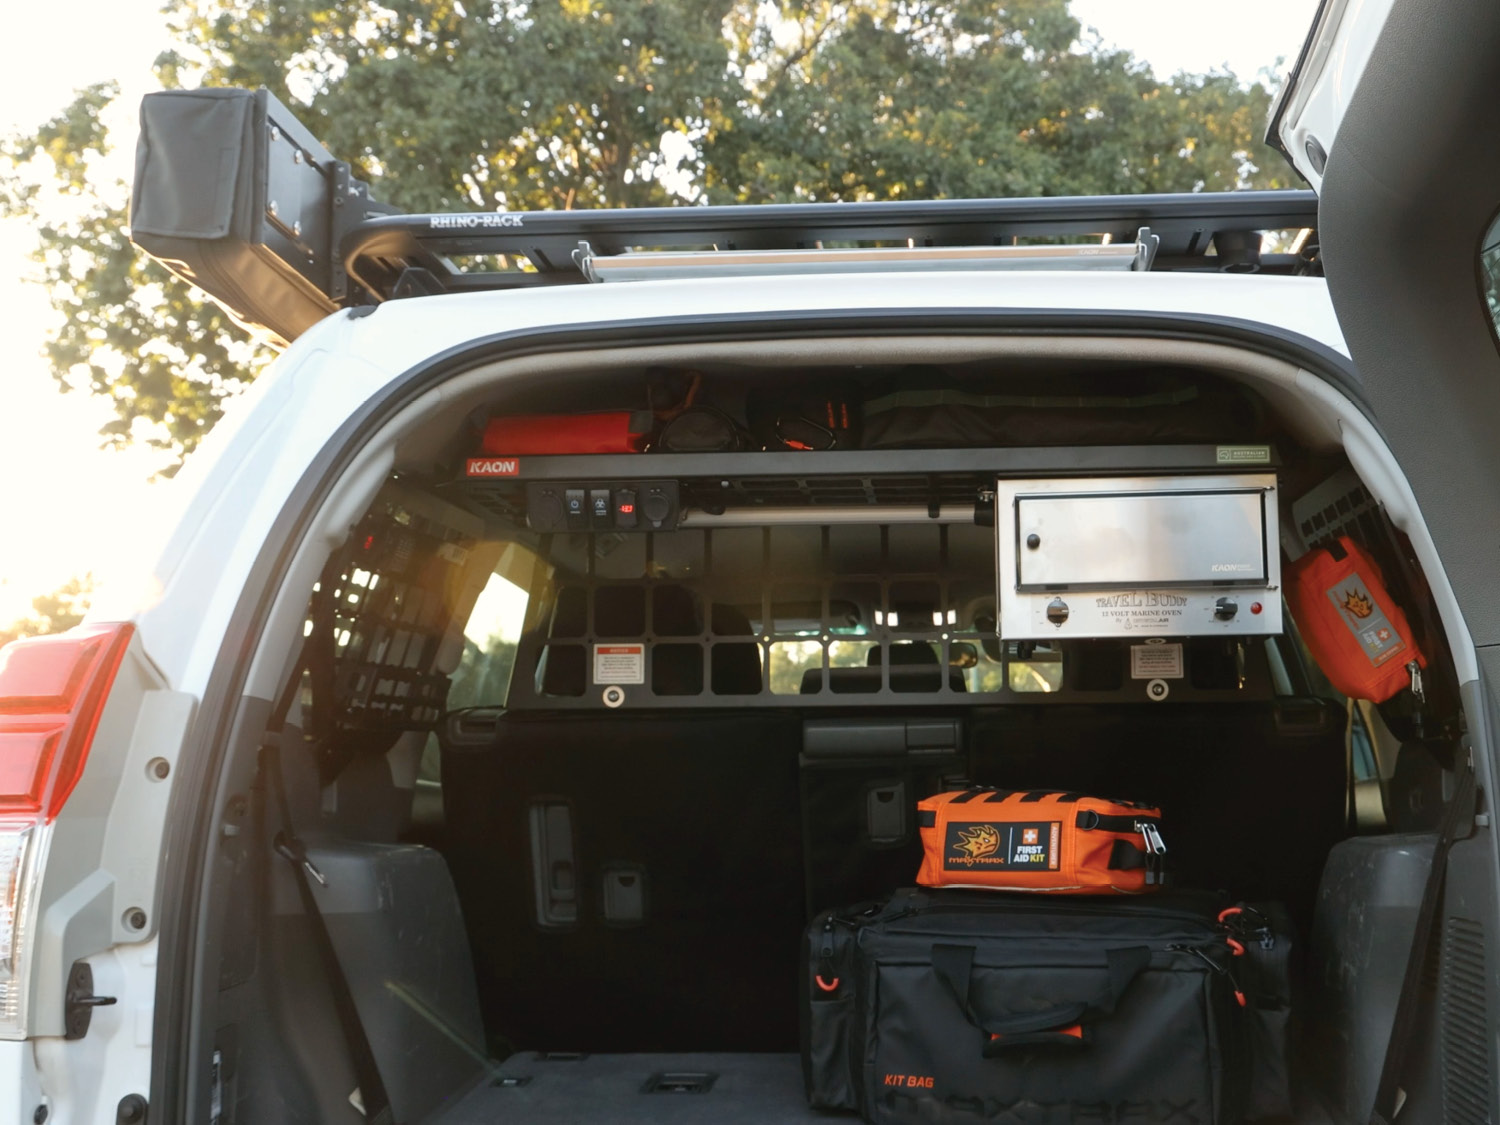
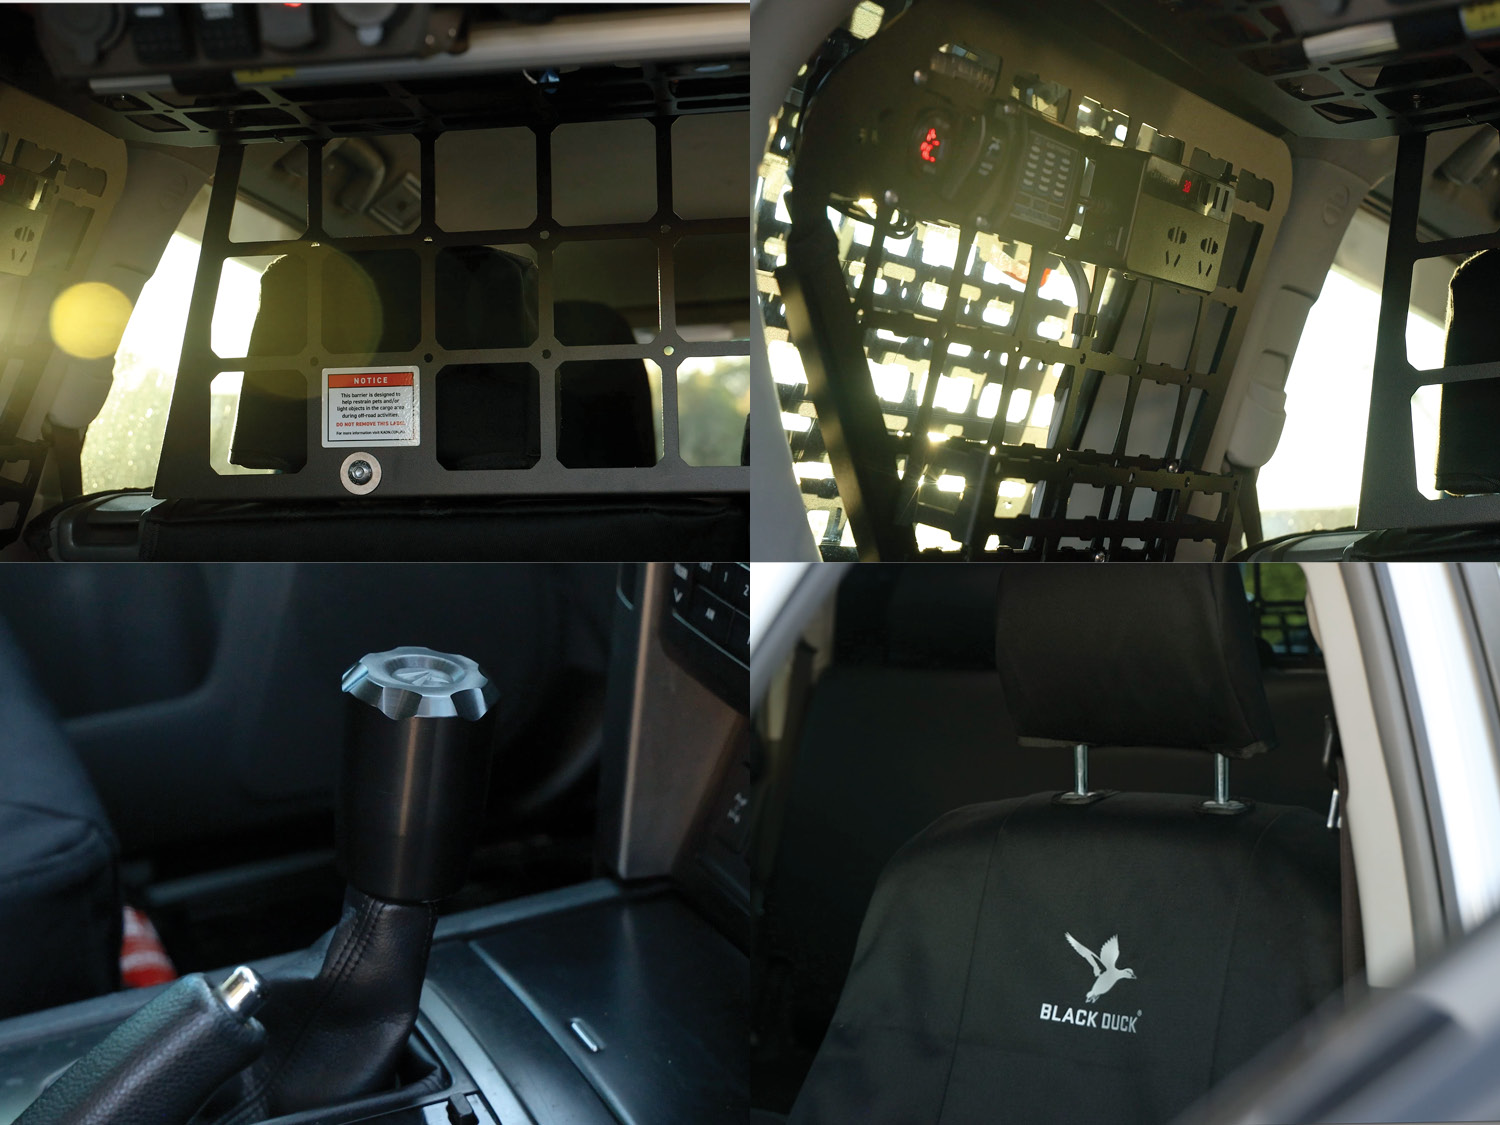
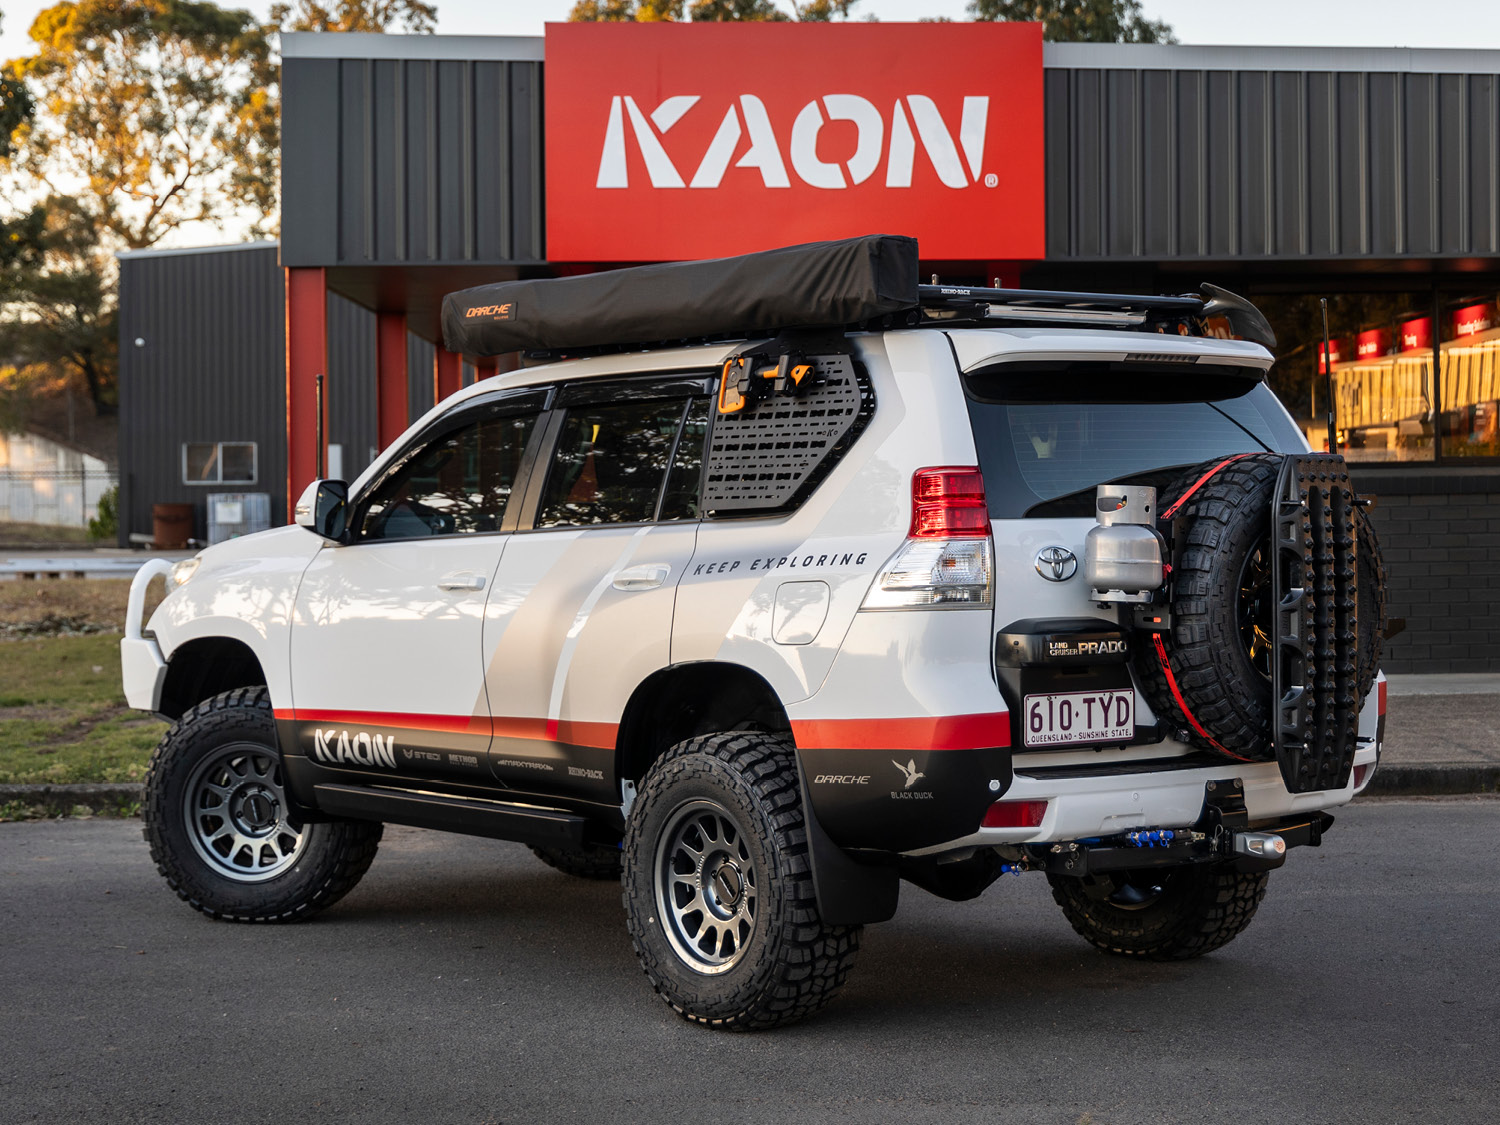
To help manage storage in the back of the car, we installed our Light Cargo Barrier, Standalone Shelf and Rear Side Molle Panels. The Light Cargo Barrier helps keep gear safe and secure in the back when off-road, but it can still come out in minutes, precisely what we need when packing the car to the roof for an expo. The Standalone Shelf is a collective favourite, and was immediately put to work as a place to store essentials: chairs, water hoses, first aid, awning straps and pegs, lighting and other things. It also allowed us to mount 12v items like a console and Travel Oven – but more on that later. Lastly, we added the Side Molle Panels, which we used to manage our 12v system, as well as to store Molle-compatible items, like the MAXTRAX Snake Bite First Aid Kit.
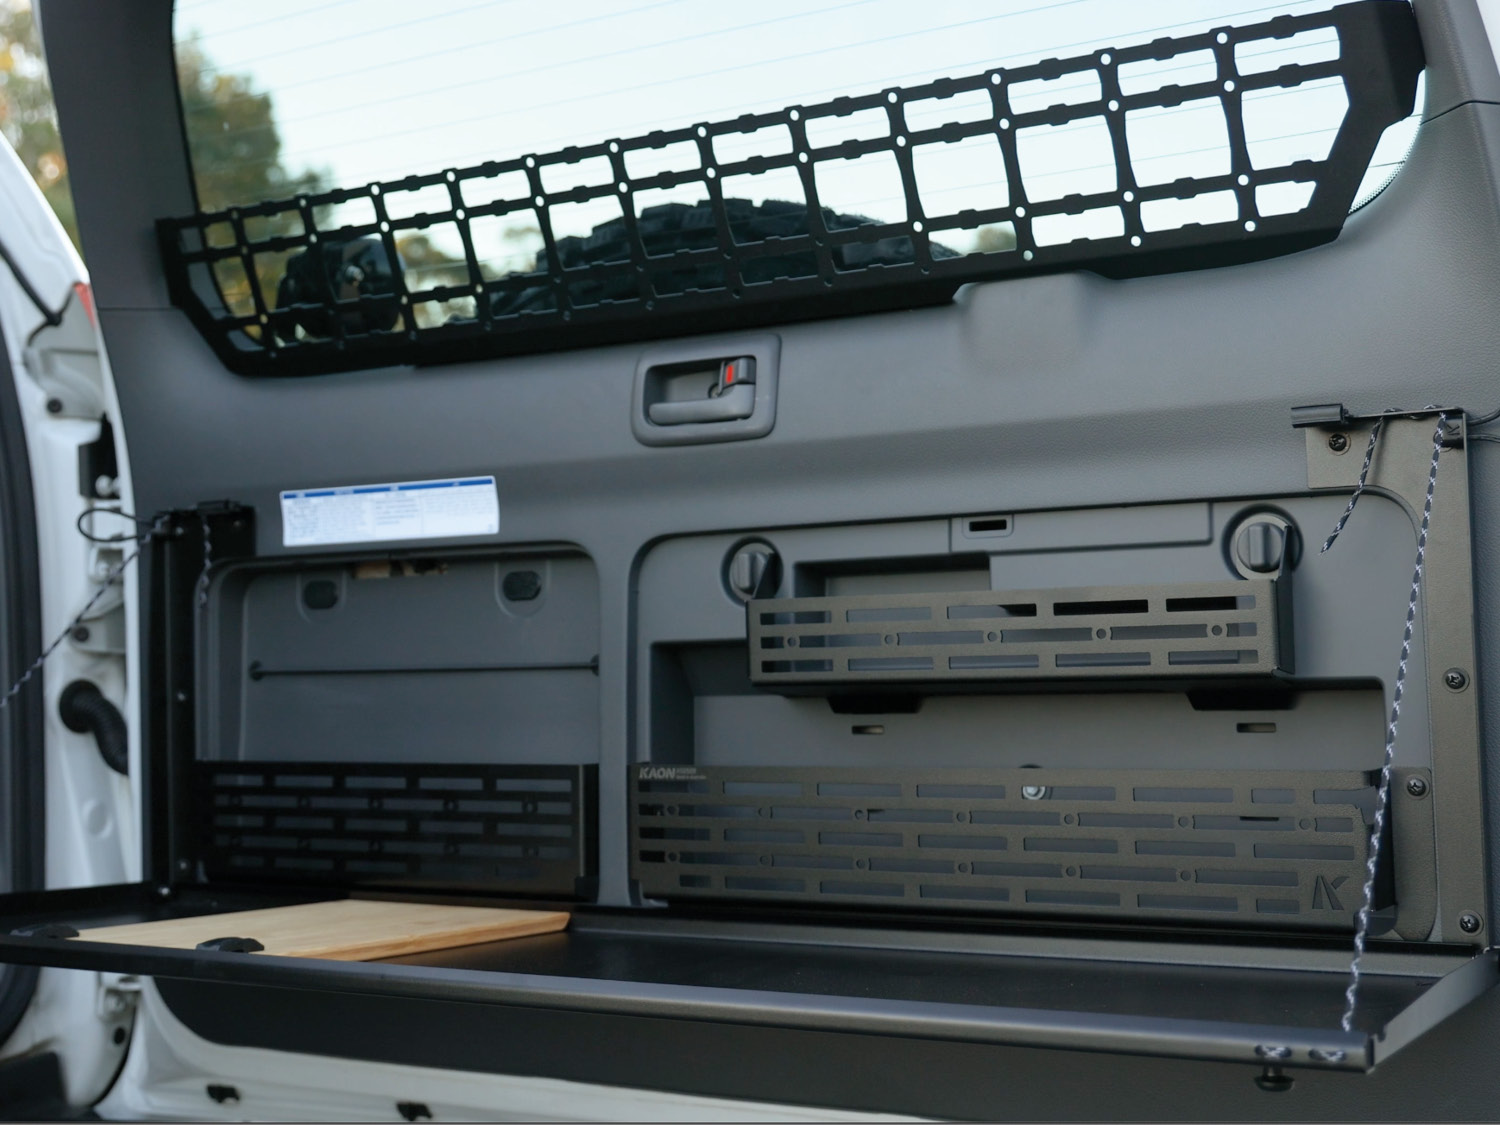
Now, we also need a surface to quickly prep meals or a coffee on the road, a space to set up camera gear, or even a place to set the laptop on to process an order for a customer at the shows. So we proceeded to (quite literally) throw the kitchen sink at it: installing the Rear Door Cage, Caddy, Utensil Cage, Table, and Kitchenette Sink Extension. Over the years, the Prado has had nearly every option installed, but we settled on the Undara Black finish, as the tonal black-on-grey looks quite sleek and discreet.
We added another concept prototype above our rear door setup, the Rear Molle Window Pocket. A full window panel has been requested many times over the last few years, but we feel we could create something more sympathetic to the vehicle's rear. With a deep recess to the window from the surrounding trim, we felt a shallow basket offered the chance to secure Molle-compatible pouches to the outside above the table while also providing storage for soft items behind. The half-height nature of the pocket made it less obtrusive than a full panel, still providing excellent visibility out the rear.
Up the front of the car, we kept it more straightforward. The original Black Duck Canvas seat covers were pretty worn after over a decade of use, so we removed them during the teardown. They had done their job incredibly well over the years: the seats underneath were pristine. It was an easy choice to replace them with another set, this time opting for the Black Duck 4Elements in Black, which are made from a heavyweight and waterproof twill while still being soft to the touch.
The finishing touches up the front included the installation of extinguishers to the drivers and passenger seats using our Extinguisher Mounts. And for the cherry on top, we couldn't resist the urge to go all-in and replace the gear knob with another concept prototype: a CNC-machined billet aluminium knob. Designed to reference the same design lines as our recovery points, we had these hard anodised in a dark grey to match the interior of the Prado.
FEATURED ACCESSORIES
KAON: Light Cargo Barrier, Standalone Rear Roof Shelf, Rear Side Molle Panels, Small Storage Pod, Travel Oven Mounts, Electrical Console, Electrical Panel, Rock Light Mounts, Rear Door Table, Cage, Caddy & Utensil Cage, Kitchenette Sink Extension, Drivers & Passenger Extinguisher Mounts, Firestryker Extinguisher, Travel Buddy Half Height Trays, Travel buddy Insulated Door | Black Duck: 4Elements Seat Covers in Black | MAXTRAX: Adventure First Aid KIT, Snake Bite First Aid KIT | Travel Buddy: 12V Marine Travel Oven | STEDI: Surface LED Rock Light in Amber (1500k)
Out the Back with the Out-Backs
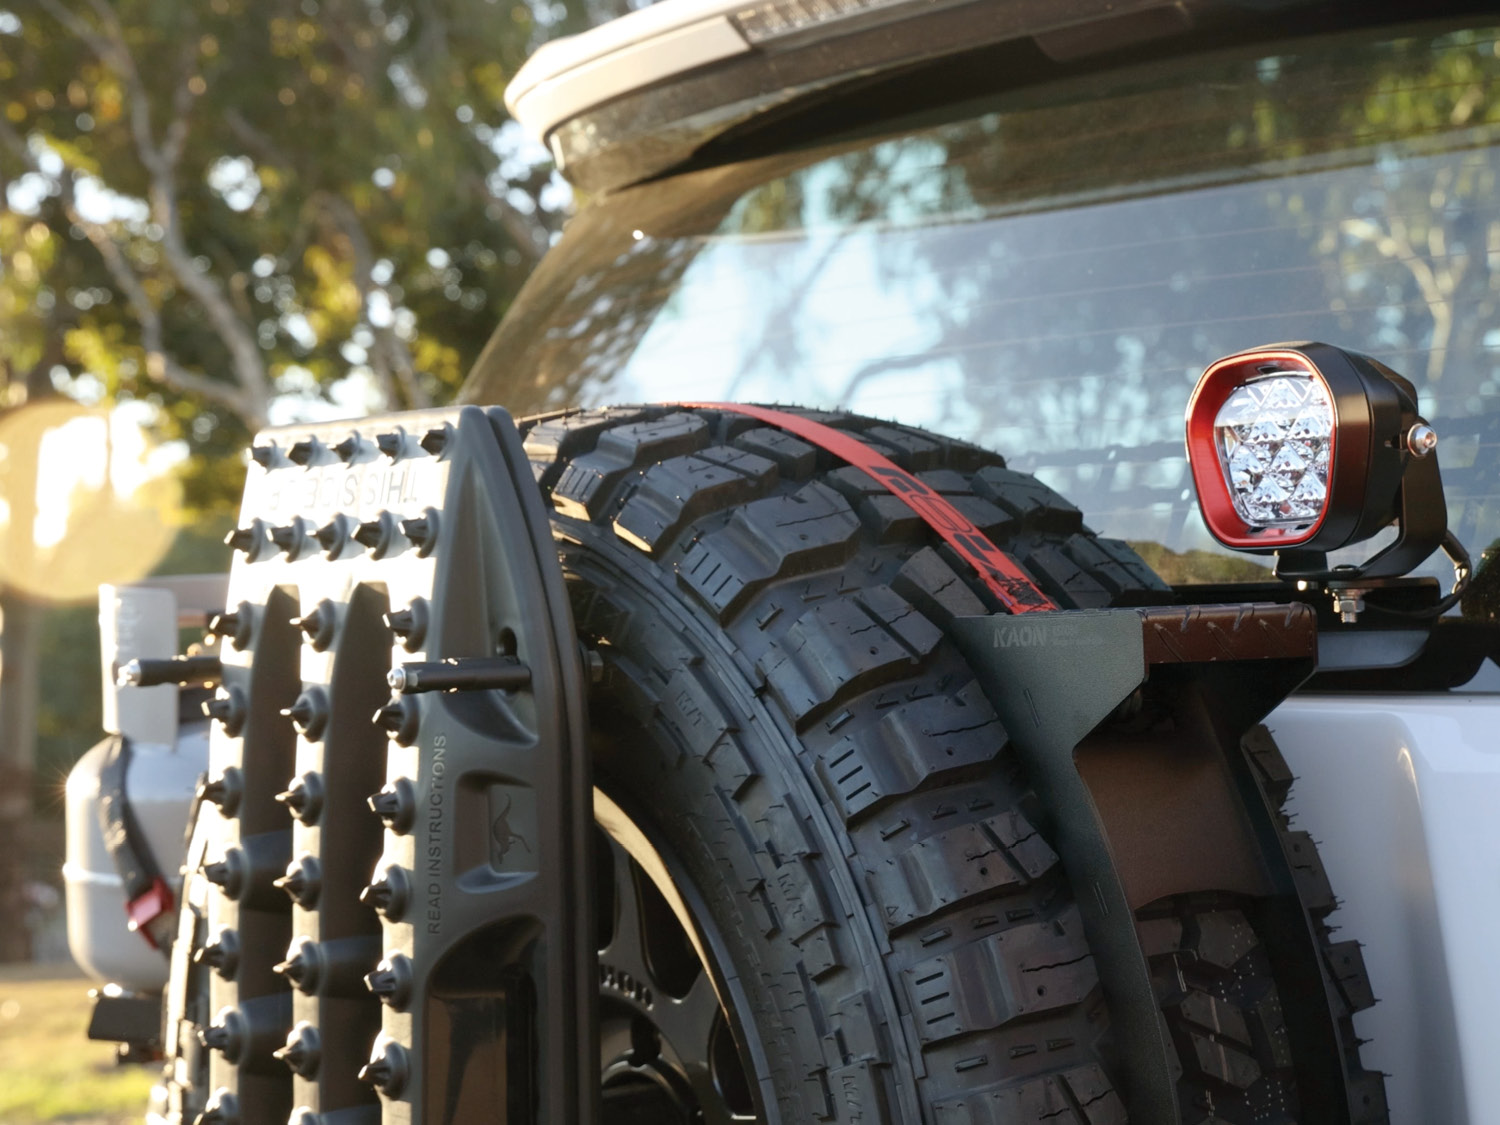
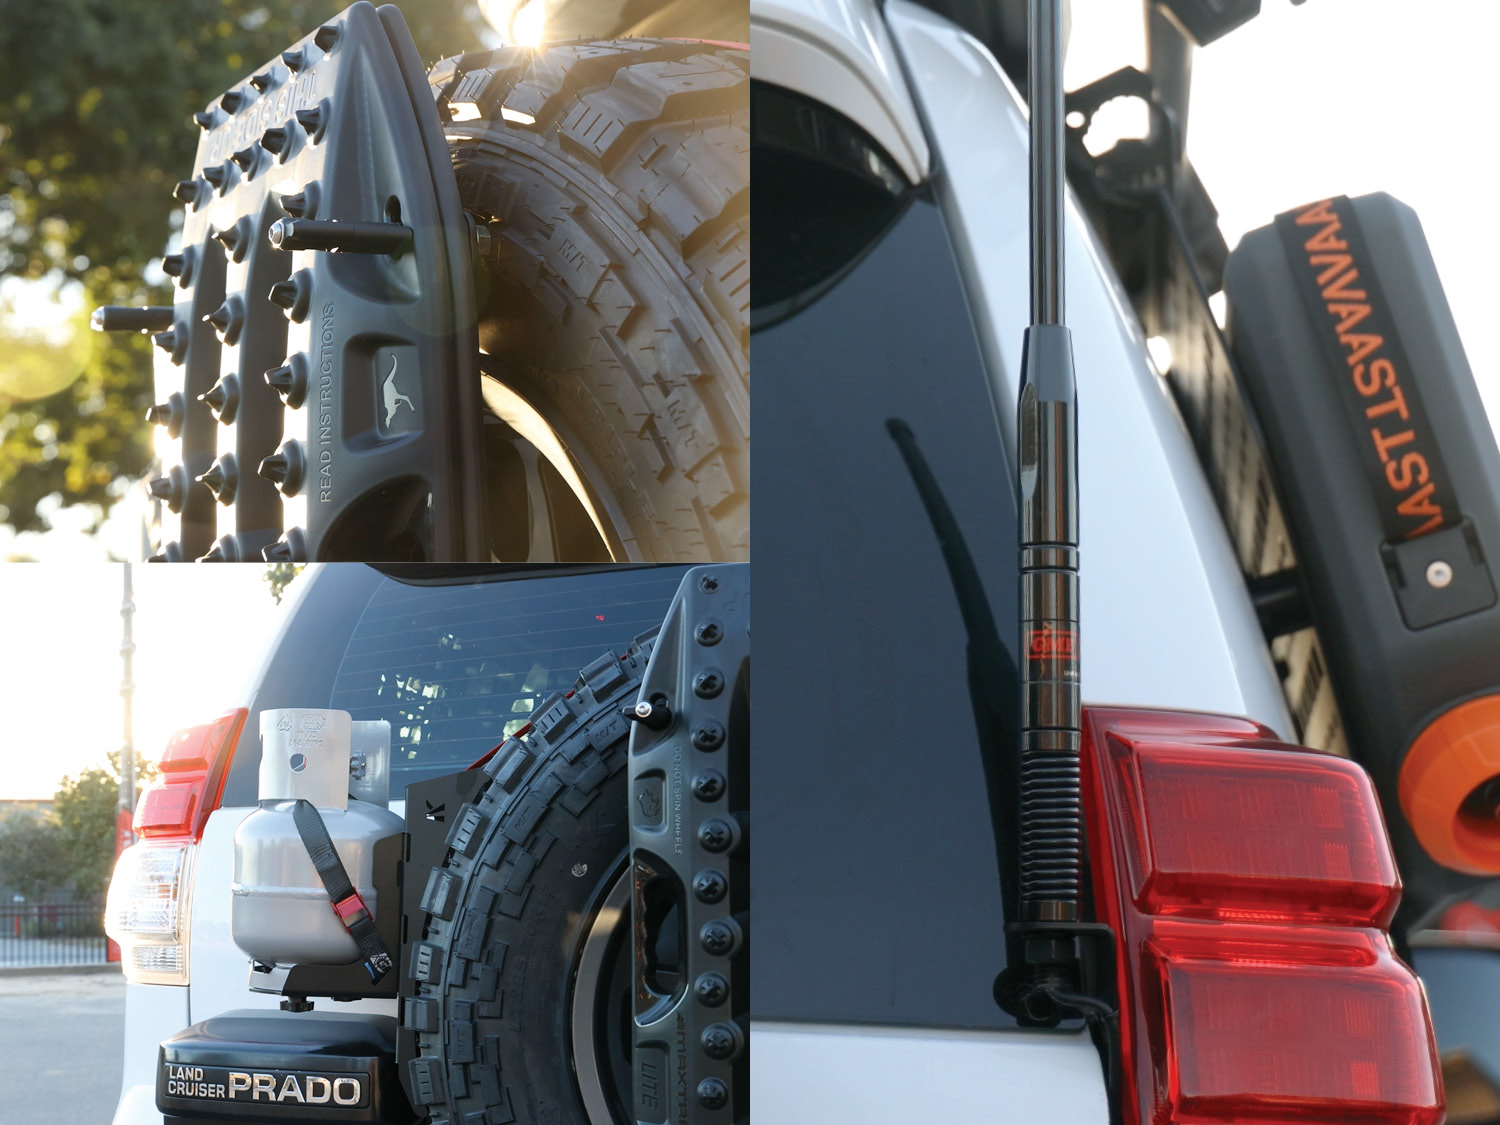
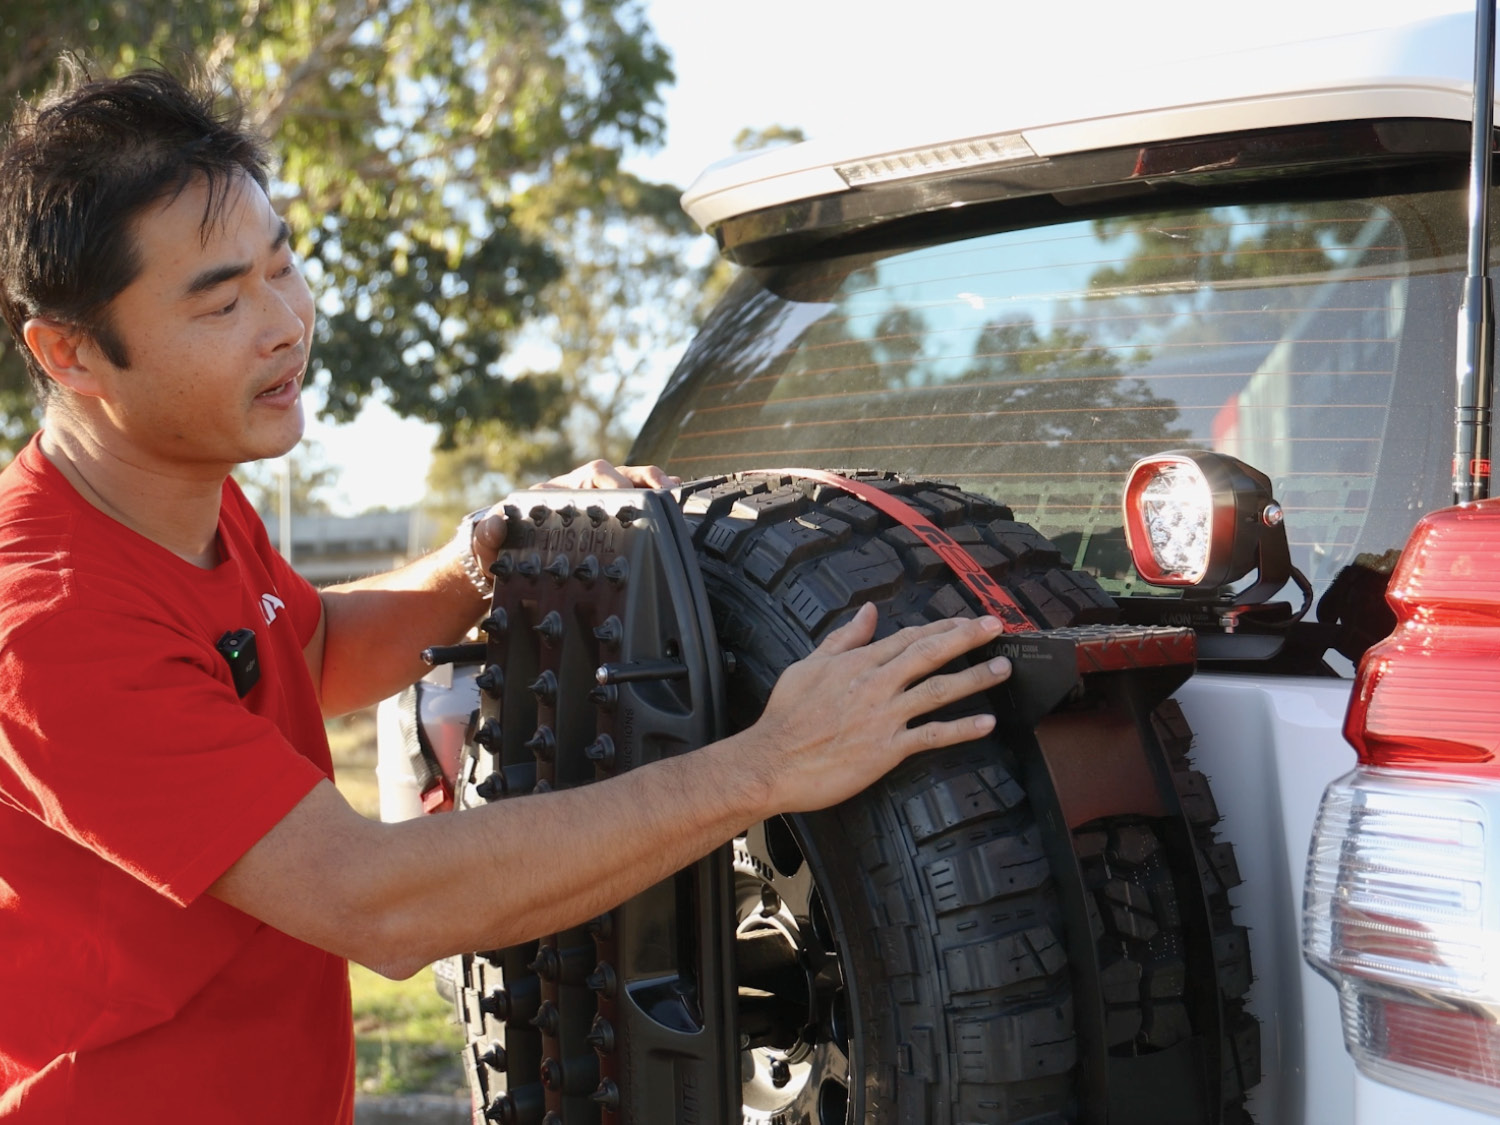
We love to find storage opportunities everywhere we can, and the back of the Prado is no exception. On the spare wheel, we incorporated our Out-Back range in the form of the Hub and LITE Mount combination and the Tyre and Gas Bottle Mount. We also added the Out-Back Tyre Step, for easy access to the roof. Lastly, we also installed the Camera Relocation bracket to facilitate these accessories.
The Out-Back Hub Mount and Rear Antenna Mount also have the added benefit of together spacing the spare tyre mount out by a further 10mm, which is precisely what we needed for bigger tyres, but more on all that later.
You may have noticed we also snuck in another antenna and a reversing light on the rear door, too.
FEATURED ACCESSORIES
KAON: Out-Back Hub Mount, Out-Back MAXTRAX LITE Mount, Out-Back Tyre Mount, Out-Back Gas Bottle Mount, Out-Back Tyre Step, Reversing Camera Relocation Kit, Rear Spare Antenna Mount, Rear Hinge Antenna Mount | MAXTRAX: LITE Recovery Boards, MKII Pins | STEDI: Type X Evo 4", Red Fascia
A New Way to Do Water Storage
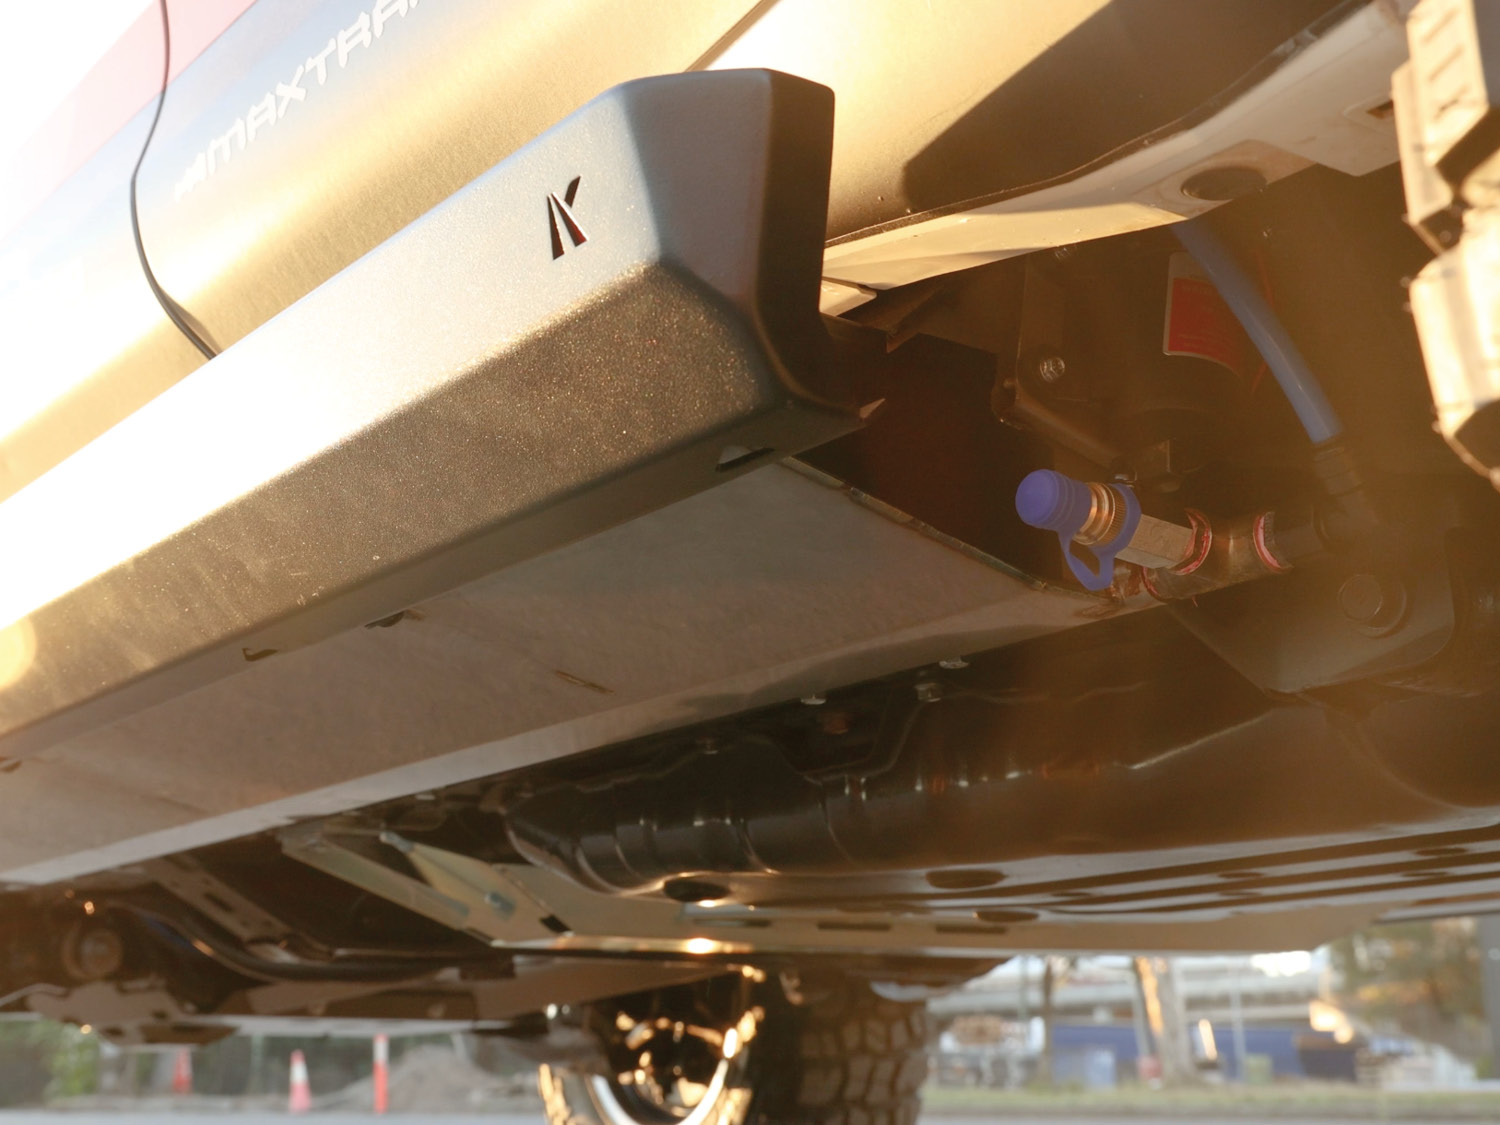
It was a no-brainer to reinstate a fresh 30L Underbody Water Tank on the Prado.
But from the outset, we knew we wanted to do some out-of-the-box things on the Prado build. We wanted to make a relatable tourer, but we also knew that as it's our nature to push the status quo, we needed to keep things interesting.
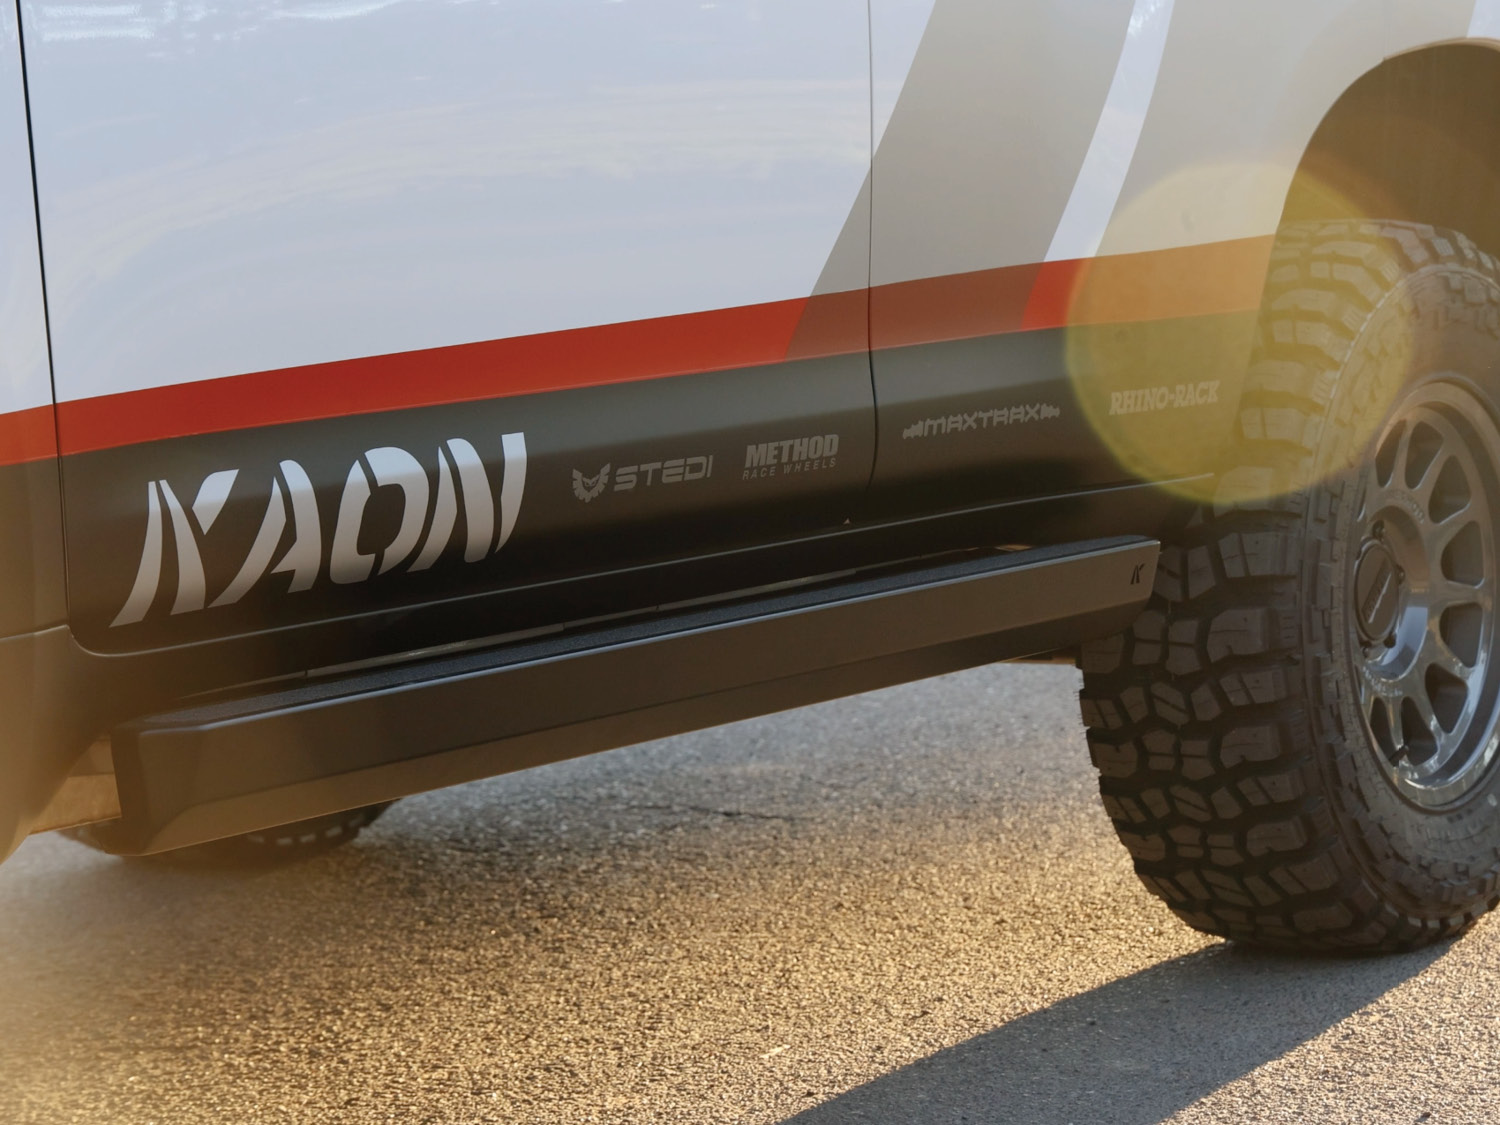
Enter something we wanted to do for years: Water Tank Side Steps.
If you've ever poked your head under the Prado, you might have noticed huge cavities running outside the chassis rails: the perfect spot for extra water. The biggest challenge to overcome first was how to mount a tank – you can't access the rails with a tank in the way. We designed a mounting system whereby a series of brackets are secured first to the chassis, which the tanks then secure to from underneath.
Next was how to integrate the step. A series of baffles were designed with a dual purpose: both prevent the water from sloshing around inside and transfer any loads from the step through to the chassis. Then we started to get really tricky – extending the tanks into each step. This clever feature allows us to gain extra storage capacity, with the steps having just enough tolerance to slide perfectly over the tanks before being fixed into position. Integrating all the elements this way also means the steps could theoretically be designed to be used with or without a tank.
The specs on the concept Water Tank Side Steps include:
The finished steps are currently in testing, as the team put them through their paces, driving halfway across Australia to the upcoming 4x4 shows at the tail end of 2024.
FEATURED ACCESSORIES
KAON: 30L Underbody Water Tank, Water Tank Pump Kit
Diving Underneath: Wheels, Tyres, Suspension, Protection & Recoveries
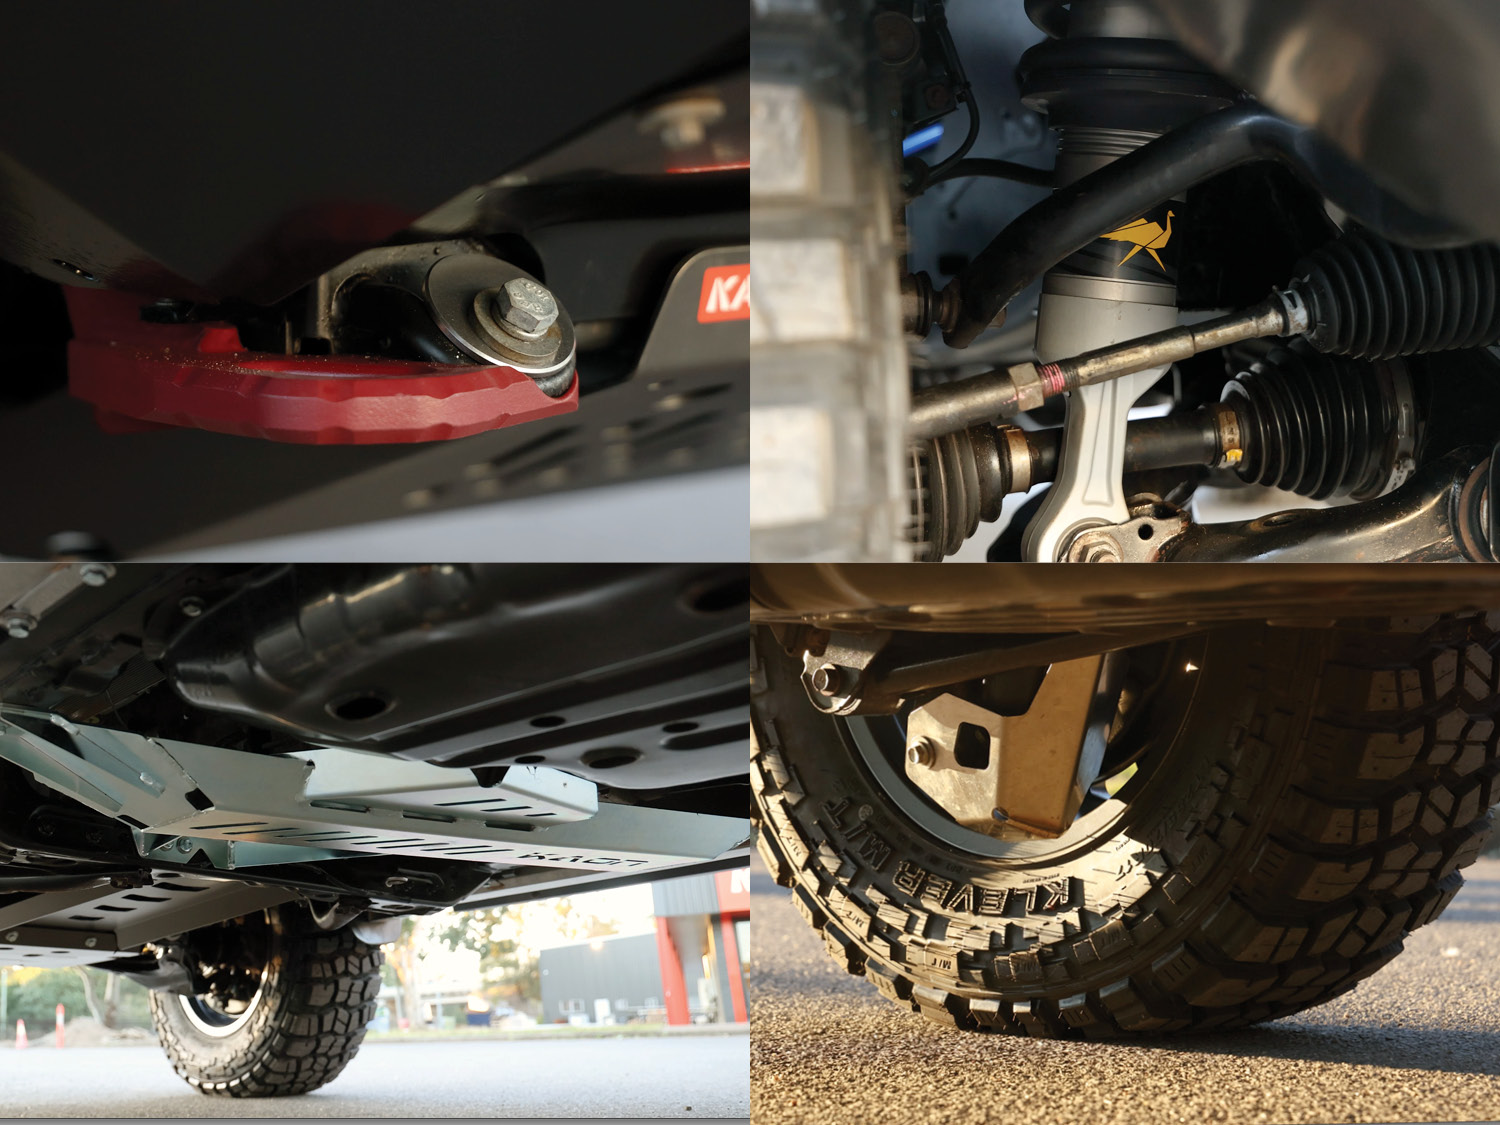
Fortunately, the Prado's underbody was in really good shape. Sadly, the same couldn't be said for the shocks. We needed to install a new 2" lift and selected ARB OME MT64s, knowing that while we didn't require a complete remote reservoir system, the extra oil capacity within the 64's monotube design wouldn't go astray.
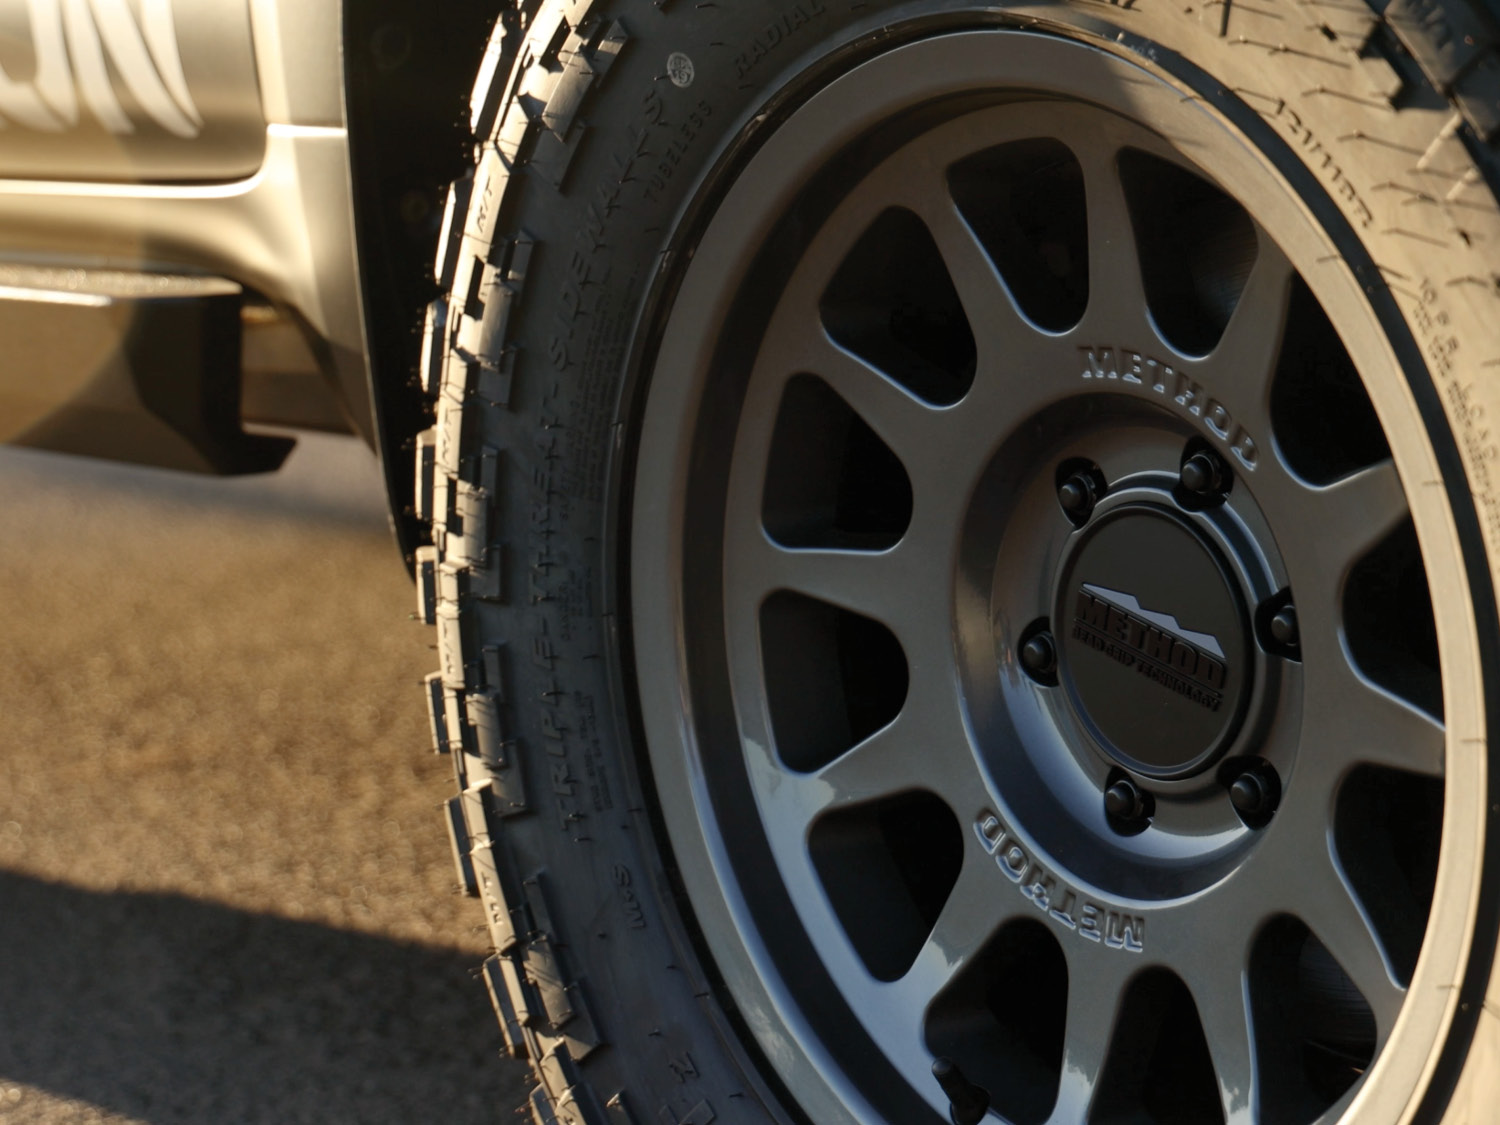
Next up were wheels and tyres. Many years ago, Tin had acquired a bargain set of FJ rims with some muddies and opted to run those on the Prado. But in later life, it ended up on a set of very pedestrian all-terrains, and the FJ rims had a bit of gutter rash from adventures (or misadventures) off-road. Picking wheels was challenging, as we wanted to find something that struck the right balance of off-road performance and elegant aesthetics. Eventually, we settled on the classic Method 703 in the Gloss Titanium finish. We could fill a page with the material optimisation techniques and load testing they do, but what sold us the most was their patented Bead Grip technology, essentially a modern replacement for traditional bead locks. With many desert-tourers in our midst at KAON, nothing speaks to us more than added confidence when running sub 10psi.
Tin has run Kenda RTs on his FJ for many years. When a customer rig stopped by for a test-fitting during the build, the team took a liking to the Kenda muddies they were running. Tin later reported that he was impressed with just how quiet the wheels were during his test drive, so we locked in a set of Klever MTs.
With any lift, there are a few modifications you might want to consider. If you've got an IFS vehicle, have invested in long-travel suspension, and want to ensure the longevity of your CVs and CV boots, a Diff Drop is a good place to start. With a solid axle rear, you might also want to look at your Panhard, to improve handling and ride. Some attempt to correct suboptimal suspension geometry with an extended Panhard, but this actually exacerbates lateral movement as the vehicle moves through the full range of suspension travel. We did a deep dive into this here.
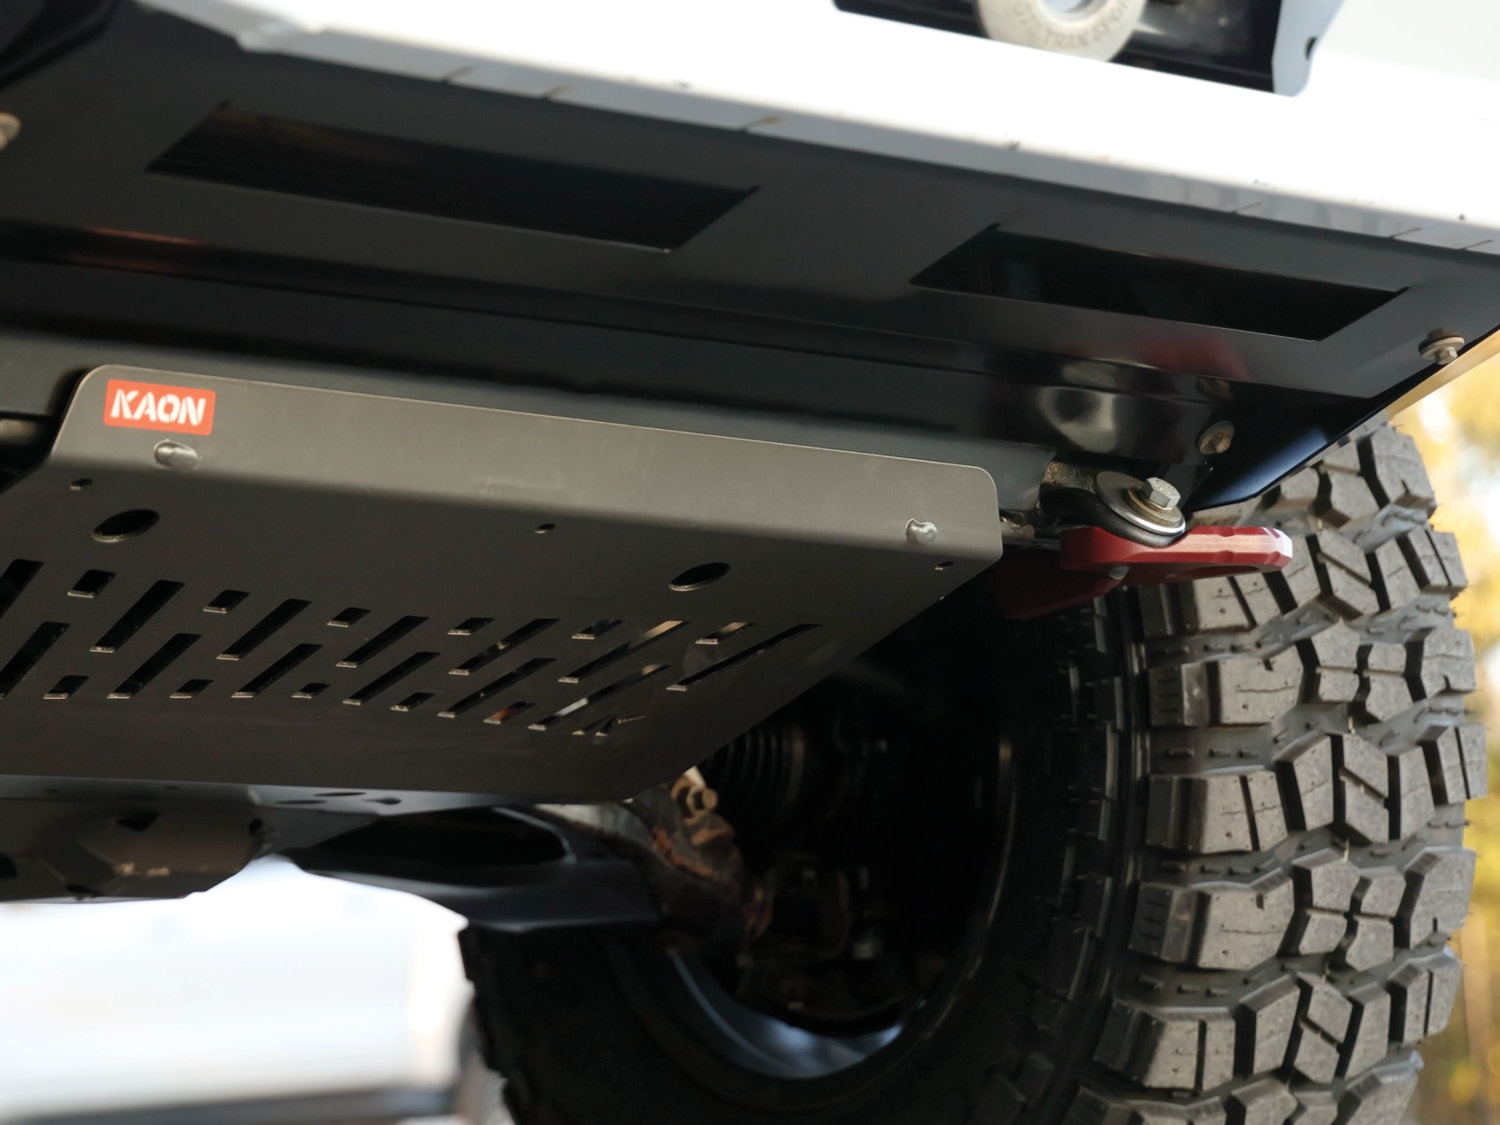
Next, we turned to protection: the first place many start when heading off-road. We know there are many vital engine and drivetrain components underneath the vehicle, and an ill-placed rock is all it can take to do thousands of dollars in damage. For the Prado, we originally had a fresh set of our newly released X700™ High-Performance UVP on there, so we reinstalled those. We then added the Actuator Guard to protect the transfer case and some Rear Shock Guards to protect the 'upside-down' exposed shafts on our newly installed shocks.
The last missing piece of the protection puzzle came in the form of another new concept prototype: an X700™ High-Performance Fuel Sub-Tank Guard.
Lastly, it would be remiss of us not to have a set of our Recovery Tow Points on the Prado. We already had a perfectly good set fitted to the Prado, so if you're curious to learn more about them, we recommend heading here. We also took the time to switch out the heavy steel hook on the Prado's original RUNVA winch with a Brummel Splice before securing it with a MAXTRAX Winch Widget. These days, with the advances in soft shackles, heavy hooks or bow shackles are not recommended as part of safe recovery practices.
We also needed to consider rear recoveries, so we added a MAXTRAX Hitch 50 to the Tow Bar. We then finished gearing up for recoveries by sourcing a MAXTRAX Beach Recovery Kit. We're big fans of their Fuse Shackle concept, which essentially works like an electrical fuse: controlling the point of failure in your recovery train to create safer and better-managed recovery situations. And if you want to learn why recoveries go wrong, we've got you covered here.
FEATURED ACCESSORIES
Method Race Wheels: 703 Bead Grip in Gloss Titanium | ARB: OME MT64 | MAXTRAX: Hitch 50, Beach Recovery Kit, Winch Widget | KAON: Front Arm-Style Diff Drop, Panhard Corrector, High-Performance X700™ UVP (Front, Sump & Trans), Actuator Guard, Rear Shock Guards, Recovery Tow Point
Working Out 12 Volt: Lights, Comms, Batteries & Little Luxuries
The biggest problem we usually see with 12-volt setups is a lack of knowledge and planning, which results in poor cable management and, ultimately, accessories piggybacked off one another. Not only does this make it hard to alter your setup when things change, but it also means that it's incredibly difficult to troubleshoot when things go wrong.
For the Prado, our setup is by no means extravagant. But even so, the list of things we needed quickly added up:
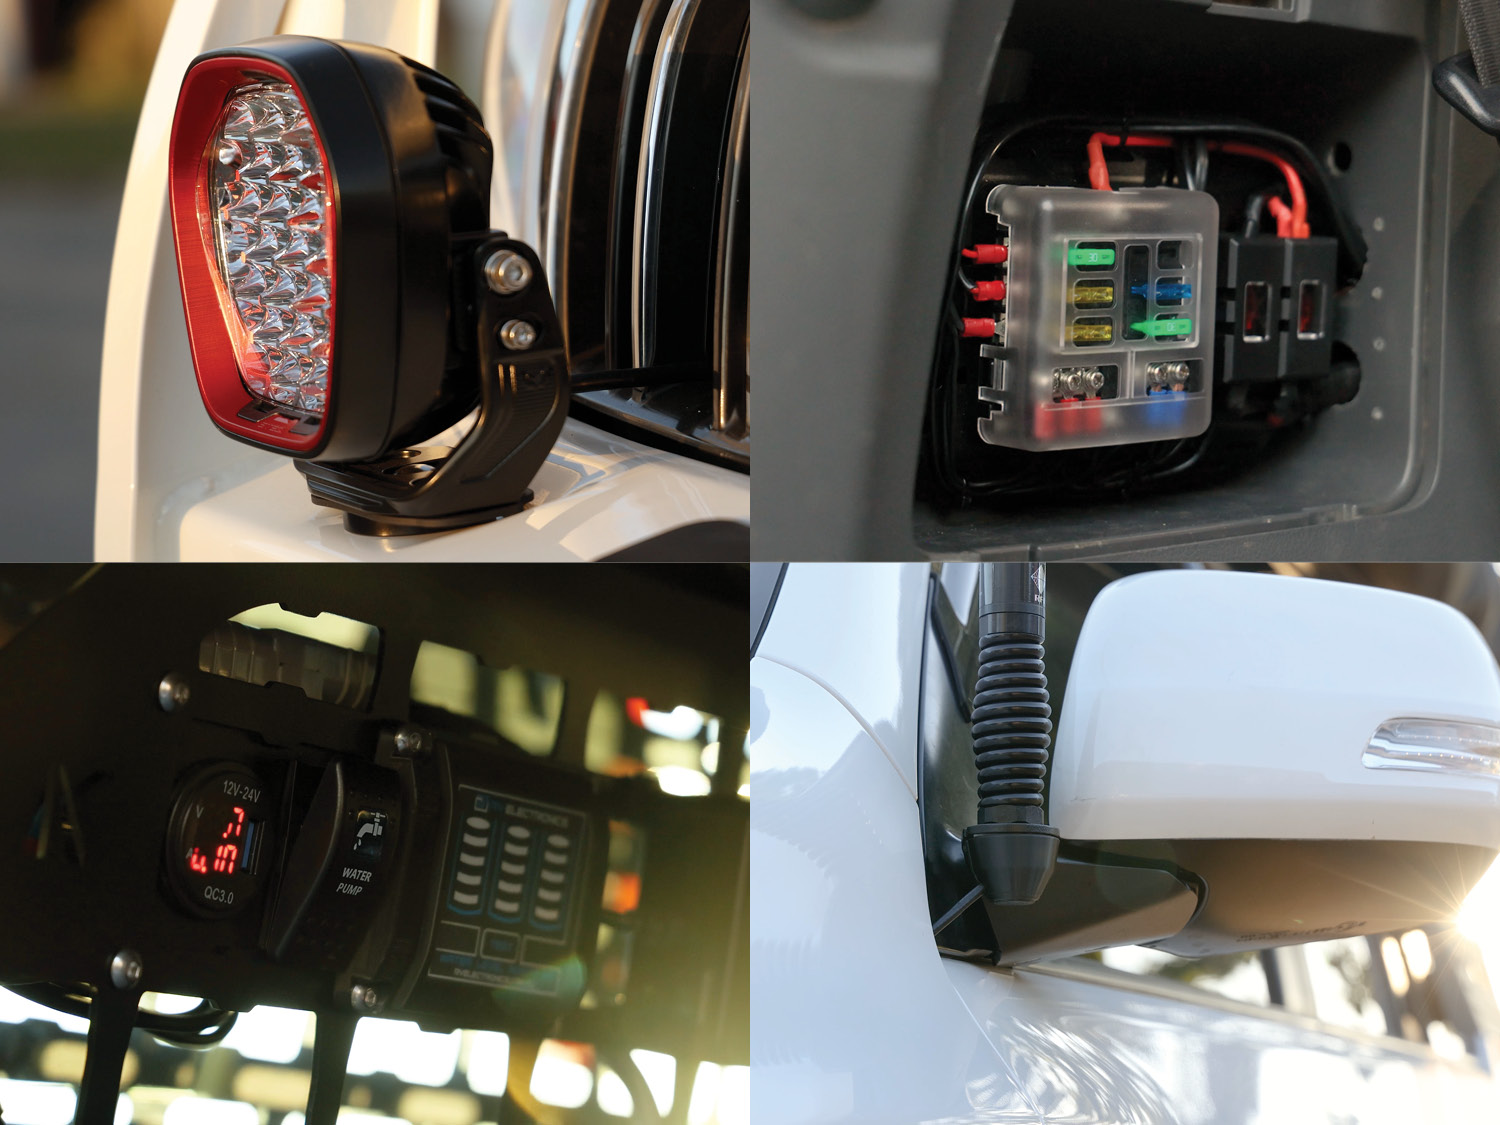
With the dual battery setup in the Prado, we ran all our high-draw accessories from the main battery, while our auxiliary battery was reserved for accessories we wanted to run while the ignition was off. We relied heavily on our Fuse Brackets during the build, with one for each of the batteries, and another universal one hidden in the rear cargo space, managing all the accessories out the back.
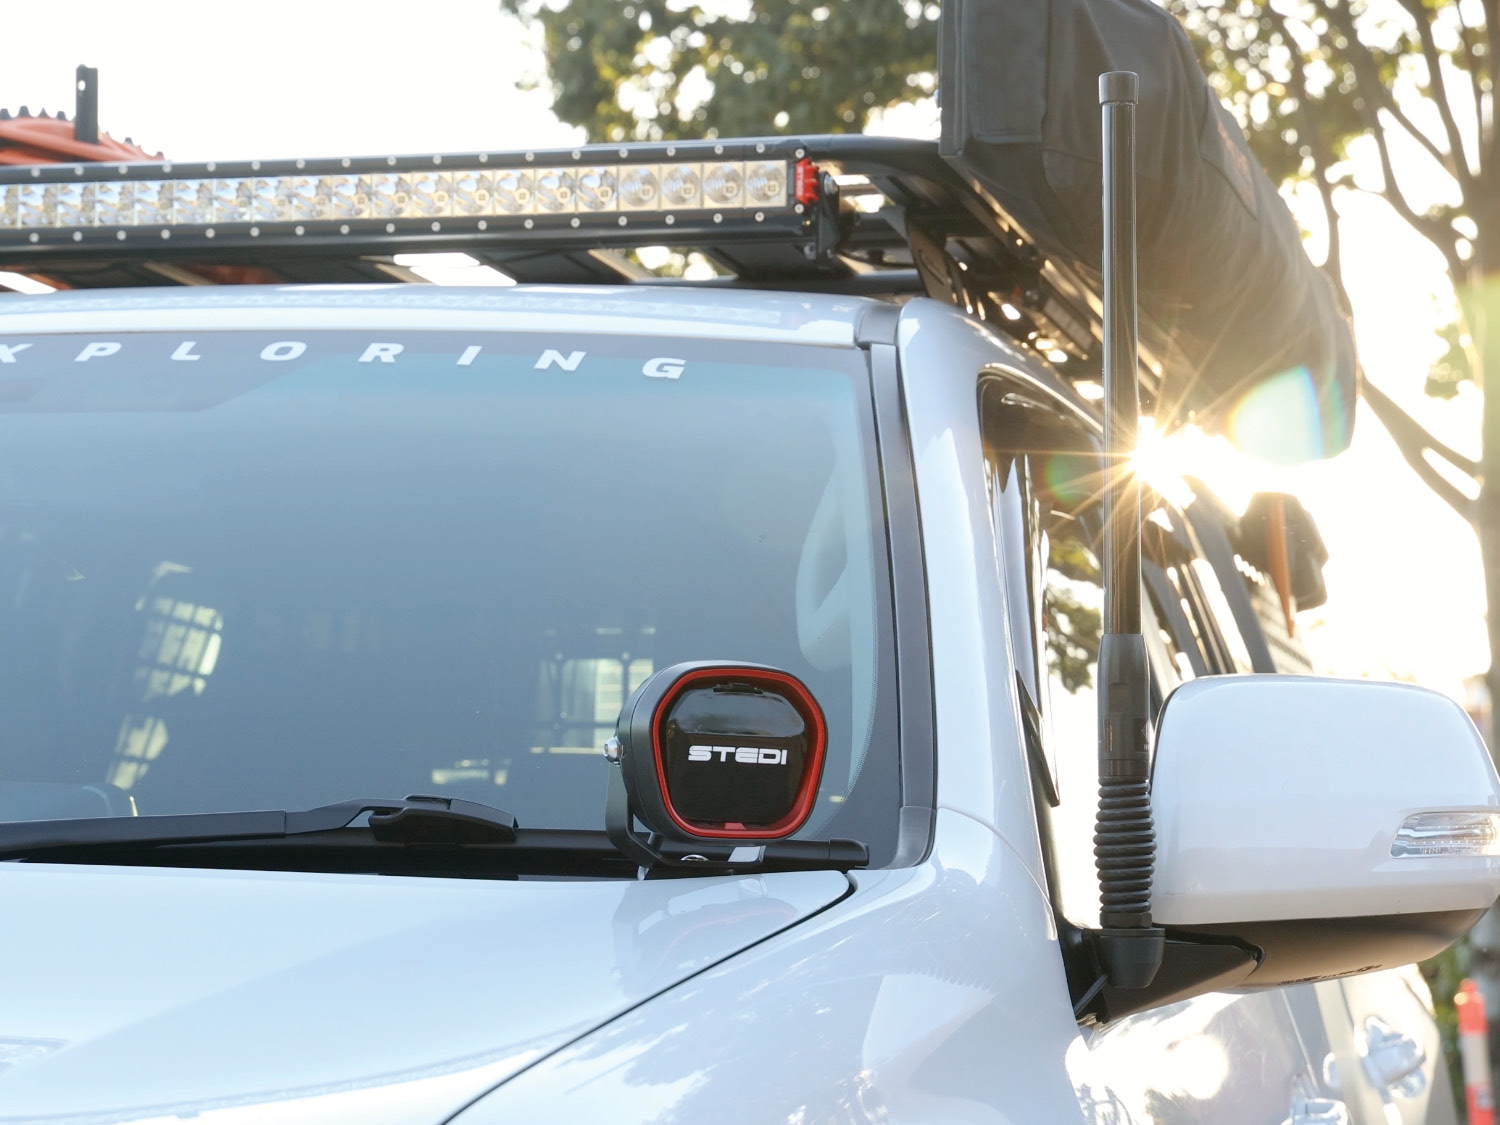
For lighting, we exclusively used STEDI on the Prado, as we're fans of their innovative, well-designed, and high-quality lights. But further to this, by selecting to use a range of lighting from a single manufacturer ensures everything works perfectly in concert with one another. From the wiring looms to the switch gear, installing them together was a seamless experience. We chose the new Type X Evo range as they offer superior performance, while the design lines complement modern front grilles – and this was no exception on the Prado.
For communications, we opted for a GME XRS Connect UHF CB Radio, which we paired with a GME AE4704B 2.1 dBi Radome Antenna. Another new concept prototype helped with mounting the Antenna, a Side Mirror Mount. We're pleased with the result, which features a CNC machined mounting block that secures the mount to the cast interior of the mirror.
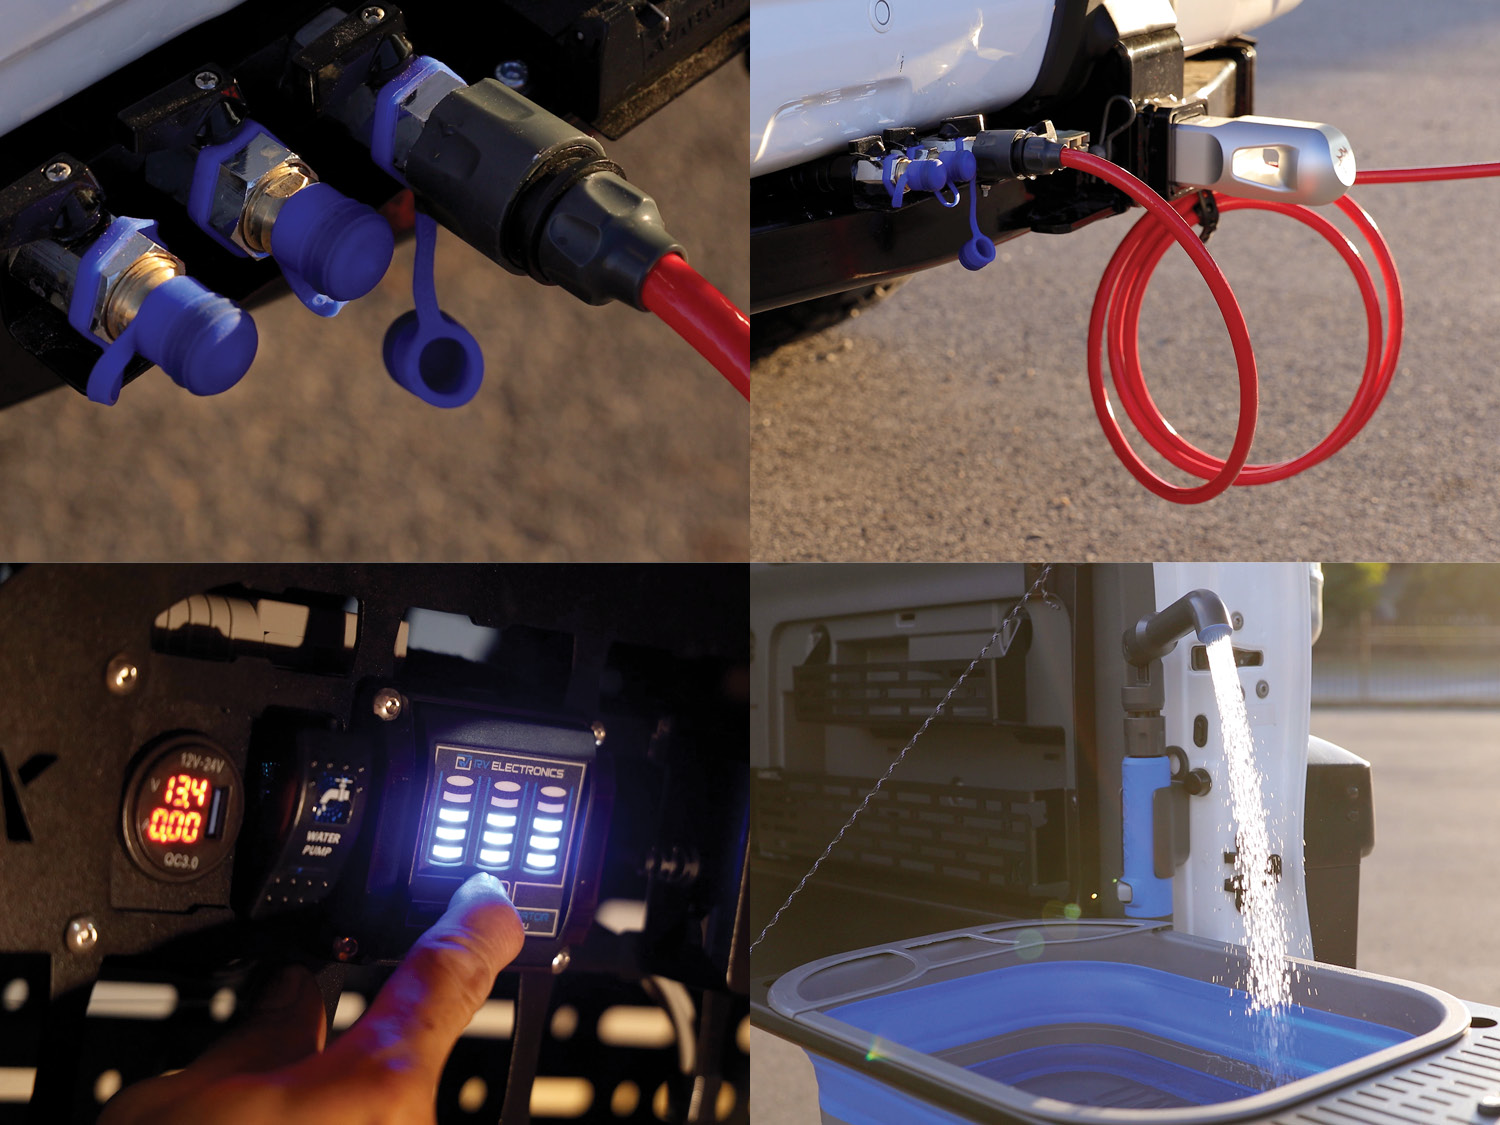
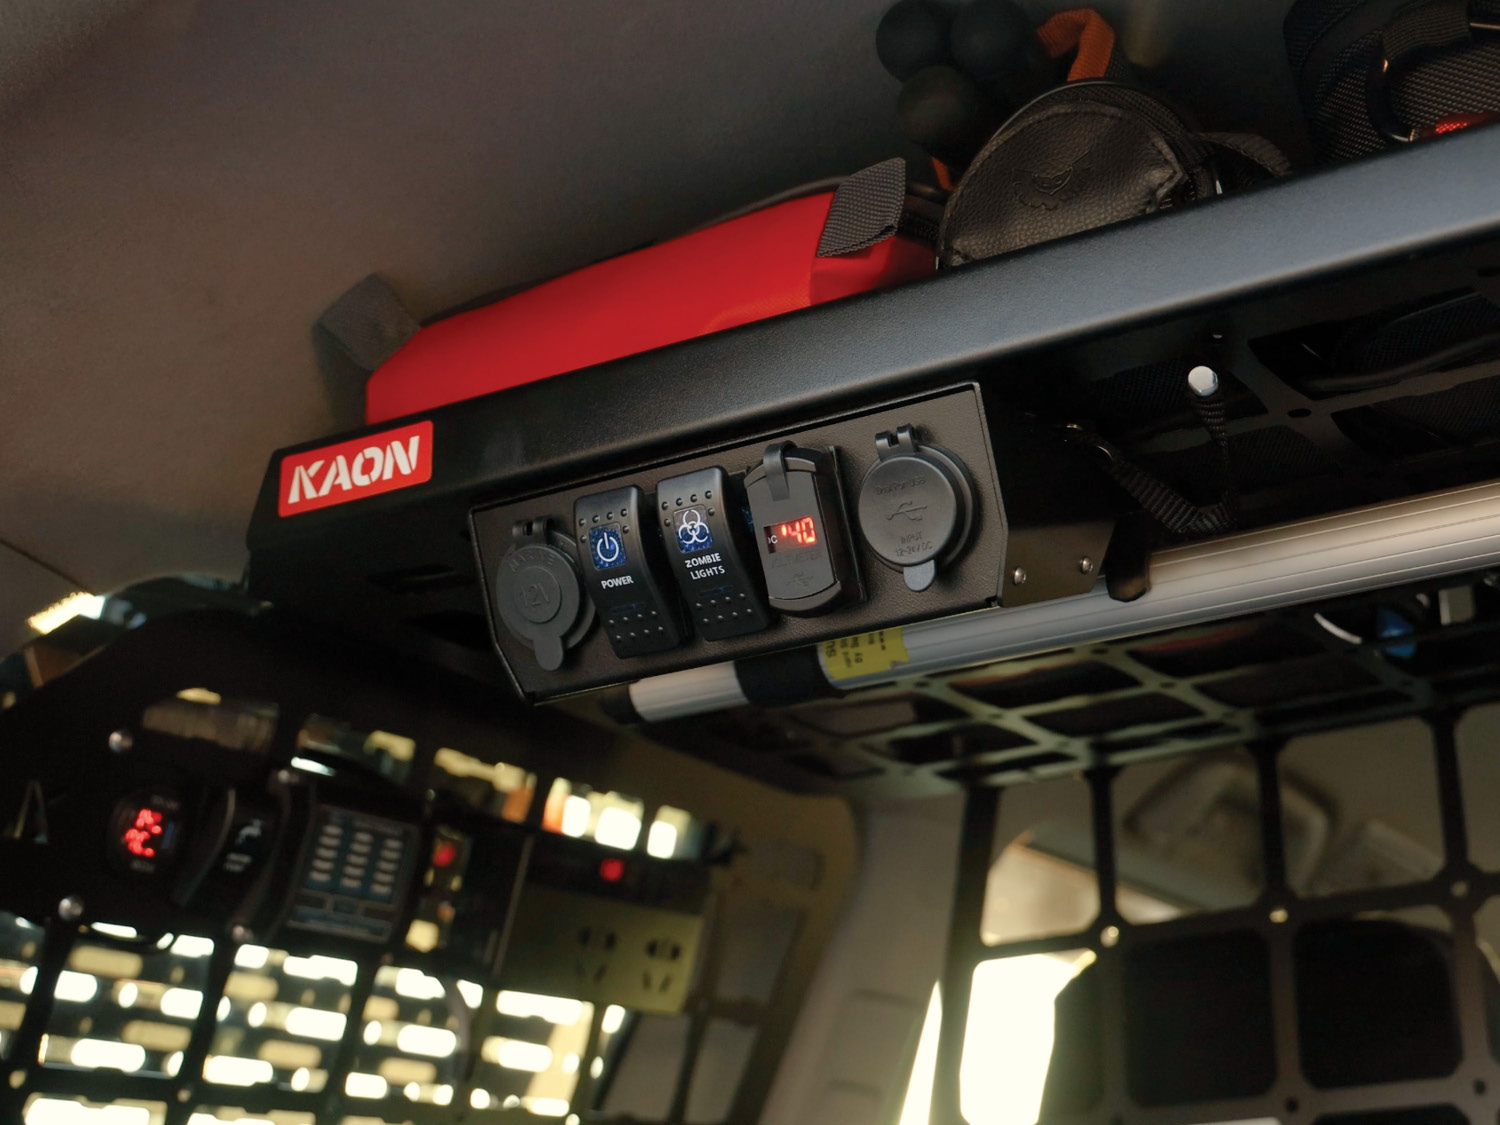
Finishing off our 12-volt setup in the rear, we mounted an Electrical Console underneath the Shelf. This was used to manage the switching of a rock light, provide charging points and a volt meter for the second battery.
Meanwhile, we utilised the left Side Molle Panel as a mounting surface for a small inverter and one of our Electrical Panels, which contains a three-way water level meter for the onboard tanks. We even snuck in another accessory port to run the wiring for the Darche awning lights.
We also wired up a Travel Buddy Oven, because hot pies for lunch… need we say more?
FEATURED ACCESSORIES
STEDI: Type X Evo 7", Red 7" Fascia, Type X Evo 4", Red 4" Fascia, Wiring Harness, Wiring Concealer, Surface LED Rock Light in Amber (1500k), Short Push Switches to suit Toyota | KAON: Bonnet Hinge Antenna Mount, Rear Spare Antenna Mount, Rear Hinge Antenna Mount, Battery Fuse Bracket, Universal Fuse Bracket, Rock Light Mounts, Electrical Console, Electrical Panel, Travel Oven Mounts | Travel Buddy: 12V Marine Travel Oven | GME: XRS Connect UHF CB Radio, AE4704B Heavy Duty Radome Antenna | RFI: CDQ3000 UHF CB Antenna
The First Chapter Closes, But We're Not Done Yet
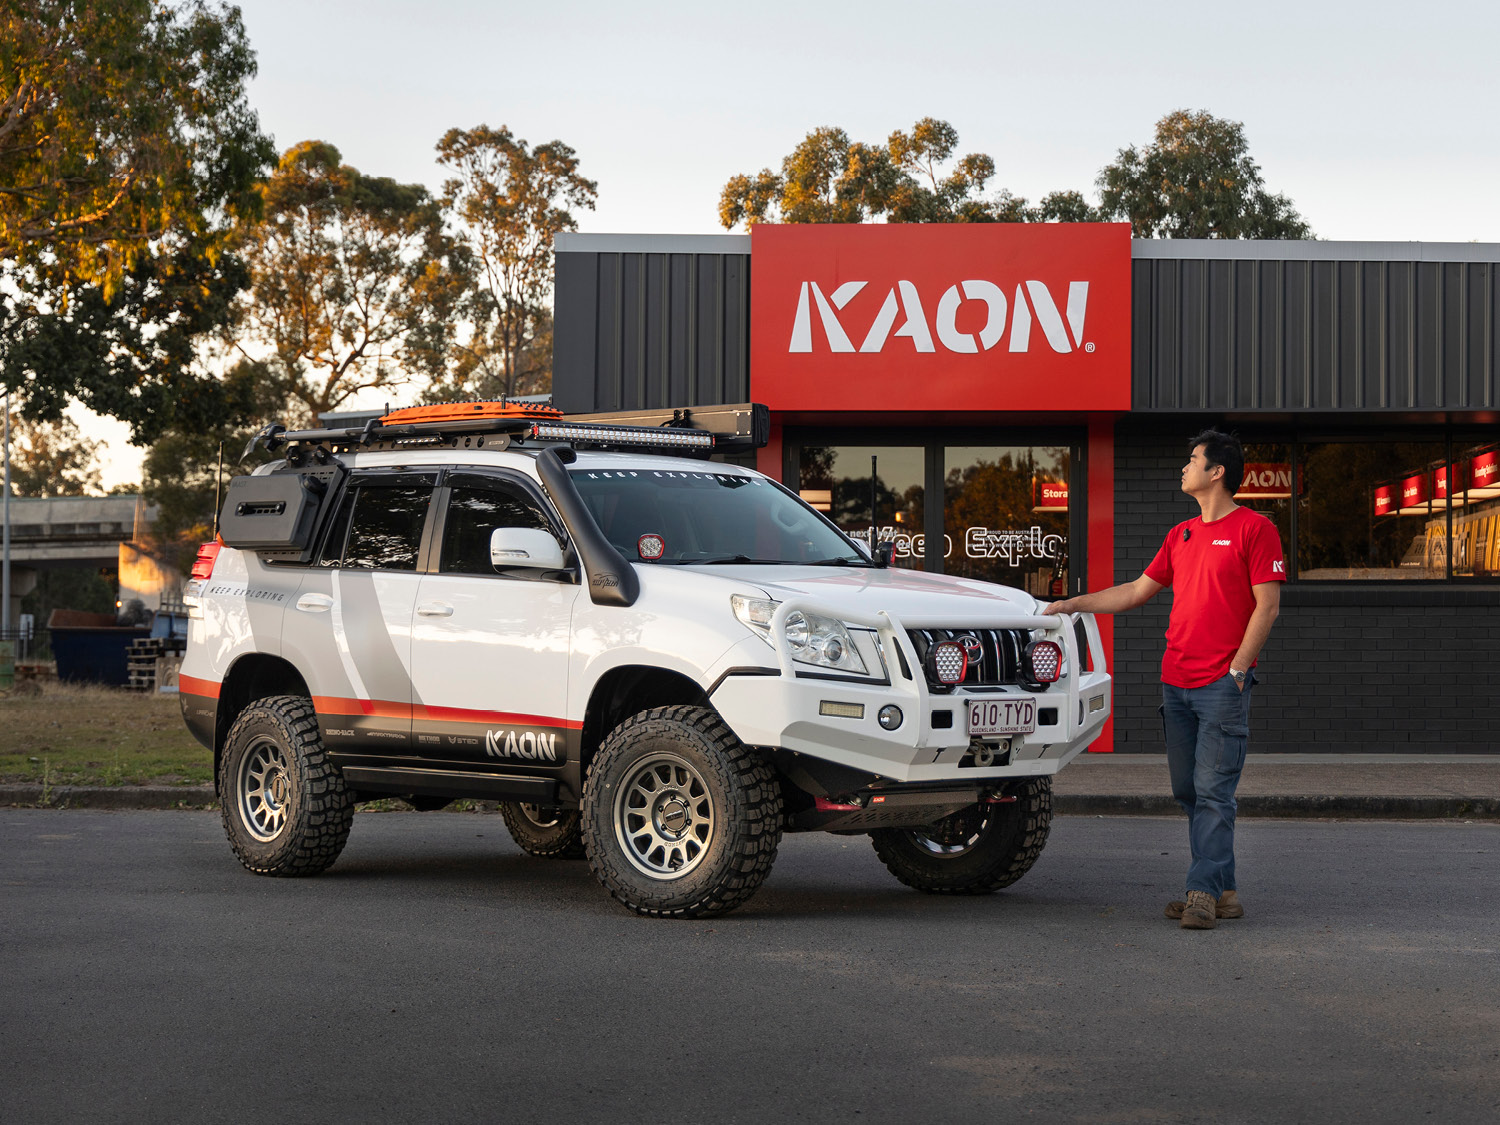
This build has been quite a journey and a real labour of love.
Not only have we restored the fifteen-year-old Prado to its former glory, but we've also had a lot of fun designing and testing some entirely new concept products along the way.
There's still much more to be done, but for now, our sights are set on the next phase of this project: putting these concept products through their paces with extensive testing and getting the Prado to the remaining 4x4 shows for 2024, so we can get your feedback.
We've been humbled by all the partners who have jumped on board with this project, generously offering their support. And we're grateful to our loyal community, who have sent through suggestions and ideas, and have cheered us on from the sidelines.
Finally, a huge thanks to all our people at KAON; this build would not be what it is without them.
To see the Prado in the flesh, visit us at:
MELBOURNE
National 4x4 & Outdoors Show
Friday 23 - Sunday 25 Aug 2024
SYDNEY
4WD & Adventure Show
Friday 6 – Sunday 8 Sept 2024
KAON HQ – BRISBANE
Cnr Boundary Rd & Antimony St,
Carole Park QLD
Prado to Perth
By: Dave on 28 August 2024Are you guys coming to the Perth 4wd show?
KAON 4x4 Touring Accessories Response
We sure are! :)
Found yourself off-track? Our team is on hand to help you get unstuck.