1
Skip to main content
KAON 4x4 Touring Accessories logo
    • SHOP BY CATEGORY
      • 4x4 Storage
        • Light Cargo Pet Barriers
        • Standalone Shelves
        • Barrier & Shelf Bundles
        • Interior Molle Panels & Dividers
        • Rear Door Storage
        • Storage Accessories
        • Roof Rack Accessories
        • Water Tanks
      • Protection
        • Engine & Transmission Guards
        • Fuel Tank Guards
        • Shock & Auxiliary Guards
      • Camping
        • BBQ Accessories
        • Travel Ovens & Accessories
        • Tables & Cages
      • Recovery
        • Maxtrax Accessories
        • TRED Accessories
        • Recovery Tow Points
        • Shovel Holders
        • Winch Accessories
      • Engine & Performance
        • Suspension
        • Transmission Coolers
        • Tools
        • Accessories
      • Brackets & Mounts
        • Roof Rack Mounts
        • Aerials & Antenna
        • Air Compressor
        • Awning
        • 12-Volt & Electrical
        • Extinguisher
        • Out-Back Spare Wheel Mounts
        • Other
      • Equipment
        • Saws & Knives
        • Books & Maps
        • Merchandise
        • Safety
      • Gift Vouchers
    • EXPLORE
      EXPLORE_BANNER
      • EXPLORE OUR GEAR
        • Standalone Shelves
        • Internal Cargo Storage
        • Rear Door Solutions
        • Under Vehicle
        • Roof Rack Accessories
        • Out-Back Mounts
      • EXPLORE BY VEHICLE
        • Nissan GU Patrol Y61 Upgrades
        • Toyota LC300 Upgrades
        • Toyota LC76 Upgrades
        • Toyota Prado 150 Series Upgrades
        • Mitsubishi Pajero NS-NX Upgrades
      • THE BLOG
      • OUTSIDER GUIDES
        • Outsider's Guide to QLD
        • Outsider's Guide to NSW
        • Outsider's Guide to VIC
        • Outsider's Guide to WA
        • Outsider's Guide to TAS
        • Outsider's Guide to the NT
        • Outsider's Guide to the SA
    • ABOUT US
    • CONTACT & HELP
      CONTACT &  HELP
      • CONTACT US
      • SHIPPING
      • RETURNS
      • STOCKISTS
      • CAREERS
      • SPONSORSHIP REQUESTS
    • 0 0

SHOP YOUR VEHICLE

SHOP BY CATEGORY
    • 4x4 Storage
      • Light Cargo Pet Barriers
      • Standalone Shelves
      • Barrier & Shelf Bundles
      • Interior Molle Panels & Dividers
      • Rear Door Storage
      • Storage Accessories
      • Roof Rack Accessories
      • Water Tanks
    • Protection
      • Engine & Transmission Guards
      • Fuel Tank Guards
      • Shock & Auxiliary Guards
    • Camping
      • BBQ Accessories
      • Travel Ovens & Accessories
      • Tables & Cages
    • Recovery
      • Maxtrax Accessories
      • TRED Accessories
      • Recovery Tow Points
      • Shovel Holders
      • Winch Accessories
    • Engine & Performance
      • Suspension
      • Transmission Coolers
      • Tools
      • Accessories
    • Brackets & Mounts
      • Roof Rack Mounts
      • Aerials & Antenna
      • Air Compressor
      • Awning
      • 12-Volt & Electrical
      • Extinguisher
      • Out-Back Spare Wheel Mounts
      • Other
    • Equipment
      • Saws & Knives
      • Books & Maps
      • Merchandise
      • Safety
    • Gift Vouchers
EXPLORE
    • EXPLORE OUR GEAR
      • Standalone Shelves
      • Internal Cargo Storage
      • Rear Door Solutions
      • Under Vehicle
      • Roof Rack Accessories
      • Out-Back Mounts
    • EXPLORE BY VEHICLE
      • Nissan GU Patrol Y61 Upgrades
      • Toyota LC300 Upgrades
      • Toyota LC76 Upgrades
      • Toyota Prado 150 Series Upgrades
      • Mitsubishi Pajero NS-NX Upgrades
    • THE BLOG
    • OUTSIDER GUIDES
      • Outsider's Guide to QLD
      • Outsider's Guide to NSW
      • Outsider's Guide to VIC
      • Outsider's Guide to WA
      • Outsider's Guide to TAS
      • Outsider's Guide to the NT
      • Outsider's Guide to the SA
ABOUT US CONTACT & HELP
  • CONTACT US
  • SHIPPING
  • RETURNS
  • STOCKISTS
  • CAREERS
  • SPONSORSHIP REQUESTS

SHOP YOUR VEHICLE

  1. Home
  2. Our Blog
  3. GEAR GUIDES
  4. Understanding Why Recoveries Go Wrong
  1. Home
  2. Our Blog
  3. GEAR GUIDES
  4. Understanding Why Recoveries Go Wrong

Understanding Why Recoveries Go Wrong


Whether you're an experienced four-wheel driver or just starting out, recoveries can seem a little daunting. Facebook, Instagram and Web forums are littered with cautionary tales of worst-case scenarios. Often it appears that they were using the required gear correctly, and it can be difficult to understand where they went wrong.  


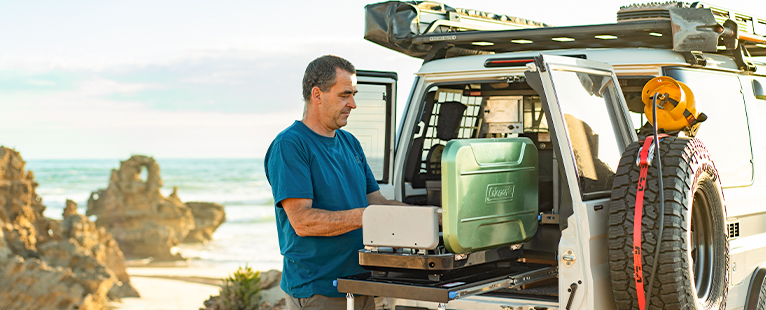
We want to help change that. Recoveries are part of life off-road, and we believe knowledge is power, especially when heading off the beaten track.  

Most know the basics. These pieces together as a system are often referred to as a 'Recovery Train': 


1. You need a strap or rope of some form. Options vary widely, with Snatch Straps or Kinetic Ropes, and a wide range of length and stretch options. It is recommended that the minimum breaking strength should be between 2-3 times the gross vehicle mass (GVM) of the lightest vehicle in a recovery situation. 
 
Most people carry a 9-10m strap, rated to 8t, with around 20-30% stretch.  


2. You'll need a shackle to attach the strap. There are two common choices: a soft shackle or a hard bow shackle. 
 
Nowadays, many prefer soft shackles, generally rated to around 14t.  


3. And last but not least: a sound attachment point on both vehicles. This might take the form of a Recovery Hitch in the rear or a vehicle-specific Recovery Point at the front. 
 
Generally, these should have a WLL (Working Load Limit) of at least 5t.  
 
It's worth noting that a towbar is only tested to 1.5 times the towing capacity. A standard 50mm tow ball and tow bar at 3.5t is load tested to only 5.25t.  


In most recovery situations, get these things right, and you'll be fine. But many don't fully understand how slightly tweaking just one or two factors can drastically alter the forces and loads at play and, consequently, the recovery outcome.  

So what factors are most commonly responsible for recoveries gone wrong, and what can you do to mitigate them safely? 

Armed with this question, our team set to work, investigating theoretical loads in recovery situations and just how quickly the forces at play can change.  

If you're interested in geeking out with us, read on. 


Let's Establish the Basics

Here are a few terms you’ll need to know, so we’re on the same page.  


MBS (Minimum Breaking Strength)  

MBS is the load a piece of equipment can withstand before breaking in ideal conditions.  

WLL (Working Load Limit) 

WLL refers to the force that can be applied to a piece of equipment without fear of breaking and includes a margin of safety, often to a factor of 2-8 times.  

GVM (Gross Vehicle Mass) 

GVM is the maximum your vehicle can weigh when fully loaded, as specified by the manufacturer. 

GCM (Gross Combined Mass)  

It's also worth considering GCM, which is the maximum weight for your vehicle and trailer combined, as specified by the tow vehicle's manufacturer. GCM comes into play when recovering a vehicle towing a camper, boat or similar.  

Coefficient of Friction  

The coefficient of friction is the measure of the amount of interaction between two surfaces, as the ratio between friction force and normal force, or the force holding the two surfaces together.  


Why People Get Confused 
 

When shopping for recovery gear, you'll find an array of terms used to rate their use. Due to the risks and consequences of a failure, these components are designed with safety factors and recommended working loads. However, how these safety factors are applied to various parts of the recovery train differ.   

For instance:

  • An 8t snatch strap recommended for vehicles weighing 2.7t–4t could break at 8t.  
  • Whereas a shackle with a WLL 4.75t rating is load-tested to 28.5t.  

This is where understanding the difference between MBS and WLL is important. A strap rated to an MBS of 8t will likely break at 8t. Whereas the WLL rating on a shackle includes a large safety margin, withstanding loads generally between 2-6 times the rated capacity. 

These safety margins account for factors such as wear and tear, material and manufacturing variations, load arrangements, and risk and consequences of failure. 

It's easy to understand why people can have difficulty comprehending what they need to allow for with recovery gear. The best way to work it out is to get an idea of what loads we can really expect. Beyond the total weight of our vehicles, how can we understand the actual loads being transferred through the recovery train?

Setting the Scene 

The loads expected during a slow winch recovery are quite different to a more explosive snatch recovery. This is why most recovery incidents involving damage or injury can be attributed to snatch recoveries. To better understand why a recovery scenario goes wrong, we need to understand the size of the loads and how they are affected by how the recovery is performed. 

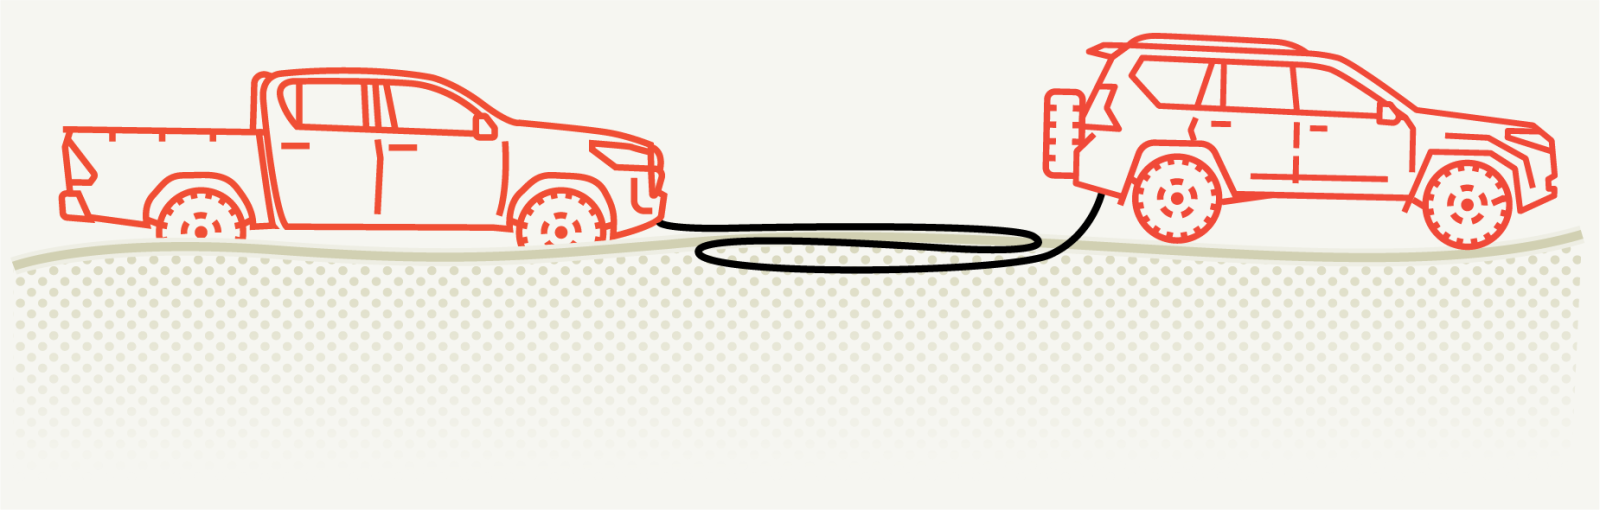
So with that in mind, let's look at what happens during a simple snatch recovery. 


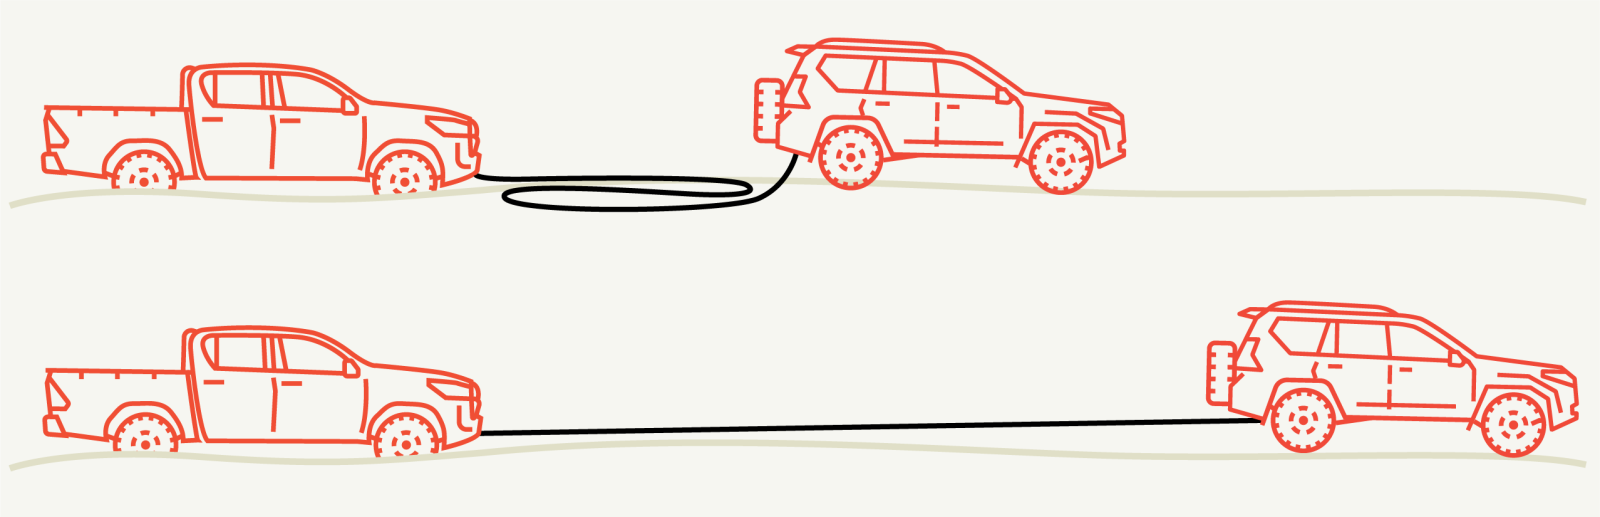
A stuck vehicle is attached to another vehicle performing the recovery.  

The recovery vehicle is positioned ahead with some slack in the snatch strap.  

Once the recovery vehicle begins the recovery, there is a point at which the snatch strap will start taking up load, stretching and slowing down the recovery vehicle. The run-up distance and acceleration of the recovery vehicle will determine its speed at this point.  

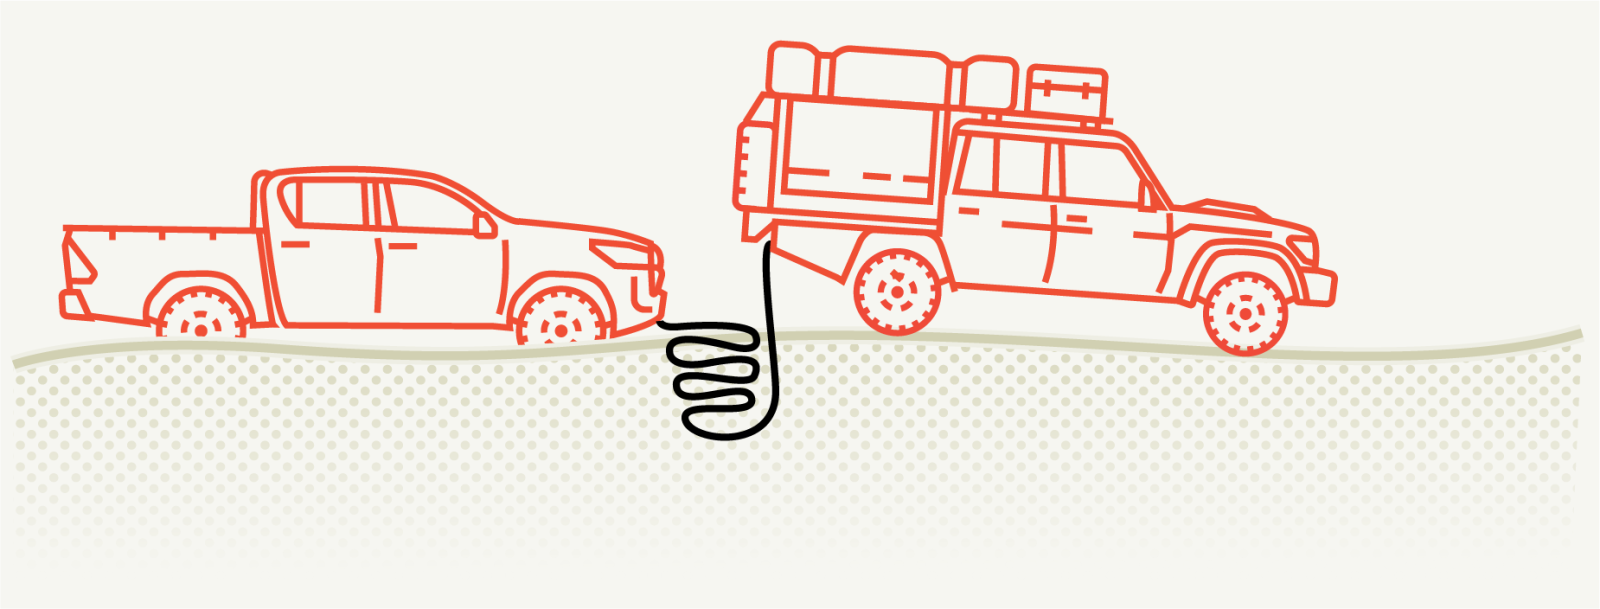
If the stuck vehicle remains stuck after the kinetic energy is absorbed, the recovery vehicle can still apply a static driving force to the tow vehicle. 


To understand the peak force possible in a recovery like this, there are two separate forces at play that we need to understand. These are: 

  1. Driving force – due to mass and friction 
  2. Deceleration force – due to transfer of kinetic energy
Understanding the First: Calculating Driving Force  


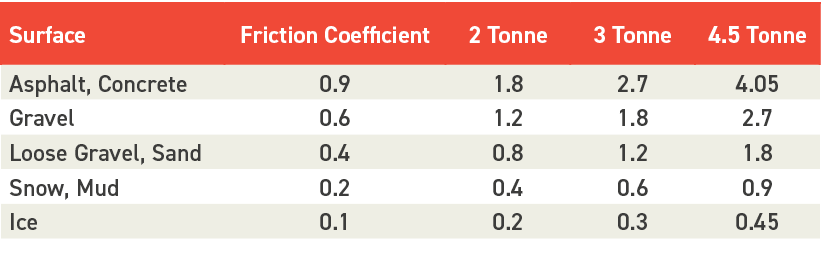
First things first, let's calculate the driving force. It can be estimated based on the recovery vehicle's total mass, as well as the coefficient of friction of the surface the vehicle is driving on.    


Simply put, we take the GVM and apply a friction multiplier, which is essentially traction.  


In the table below, our stuck vehicle has enough torque and power to spin all four wheels. You'll see that with more traction, the vehicle can generate forces almost equivalent to its mass. Situations that require a recovery, such as sand and mud, will have a much lower pulling force due to the reduced friction.


Friction Coefficient of Driving Surfaces

Understanding the Second: Calculating Deceleration Force 
 

The stretch in the strap controls the amount of deceleration, and this is easy to picture: a strap with no stretch will create instant deceleration, transferring a very abrupt, large force.  

We can calculate this deceleration force using Newton’s formula: Force = Mass x Acceleration. To do this, we need to understand two things: 

  1. The speed the vehicle is travelling when the strap begins to stretch 
  2. The amount the strap stretches 

To be confident that the actual loads are within our calculated loads, we’ll make a few assumptions based on a typical recovery. These are: 

 
  • The stuck vehicle is completely stuck and does not move during the recovery. This will give us the largest load possible and is not unplausible. 
  • The stuck vehicle will be recovered by the recovery vehicle using a single snatch strap, in a straight-line pull. 
  • The recovery vehicle accelerates from a standstill and will start to decelerate when the strap is tight and begins to stretch. 
  • We will consider the forces due to deceleration only. The recovery vehicle stops applying power once the strap has stretched and taken up the load. 
  • The Recovery vehicle’s GVM is 3t. 
  • 9m long snatch strap with 20%, or 1.8m, of stretch. 
  • The maximum acceleration of the recovery vehicle is 2.8m/s2. 
    • Based on 0-100km/h in 10 secs. 
    • It's worth noting that this would actually be much less in off-road conditions. 
  • The distance available to accelerate will depend on the take-up distance that the strap allows. 
    • Typical snatch setup is an “S” shape overlap with the vehicles a car length apart. This would allow approximately 3m of run-up if the cars are 6m apart. 
    • If the vehicles were arranged with no gap, the maximum run-up would be equal to the unstretched length of the snatch strap, that is, 9m. 


With these baseline assumptions established, we can now use high school physics and math to calculate velocity and acceleration. We need to calculate the maximum speed the recovery vehicle will achieve before the snatch strap takes up the load and begins to decelerate the recovery vehicle.

  • A 3m run-up would allow a top speed of 15km/h. 
  • If the stuck vehicle does not move, the snatch strap will stretch 1.8m and decelerate the recovery vehicle from 15km/h to 0 in same distance. 
  • This will give us the deceleration value to calculate the force transferred through the strap and the stuck vehicle. 
  • The deceleration value is 5m/s2, which will calculate to a force of 1.4t. 


What Factors Make the Biggest Difference

With all this in mind, we can now look at how the forces at play change with different variables, that is, where recoveries often go wrong.

The Recovery Vehicle’s Mass  

Mass is directly proportional to the force generated due to deceleration. A 4.5t vehicle will generate 50% more force than a 3t vehicle, provided it can accelerate up to the same speed.  

This is why we base recovery strap selection on the lighter vehicle. Straps rated to a higher weight are stiffer and require more force to stretch. A correctly selected strap will stretch more than an overrated strap, resulting in a gentler and safer recovery with lower deceleration force. 

Selecting an underrated strap means that you are more likely to approach the MBS of the strap, especially if there is any aging or degradation to the strap. Conversely, an overrated strap is more likely to overload and break the shackles or recovery point – a dangerous situation.

The Run-Up Distance  

The run-up distance depends on the length of the recovery strap and the position of the vehicles.  

If the two vehicles in the recovery are 6m apart and attached with a 9m snatch strap, the run-up distance is 3m. The maximum run-up distance would be 9m, or more with the use of a bridle and joined straps.

Velocity and Deceleration Forces based on Run-Up*

*Assuming 9m snatch strap with 20% stretch. 0-100 in 10s acceleration. 

We see here that speed depends on acceleration distance; therefore, the force generated is directly proportional to the run-up distance. A 6m run-up distance will generate twice the force of a 3m run-up. 

Simply put, more distance allows more speed, which means higher forces.

The Stretch of Your Snatch Strap or Kinetic Rope  

Now let's look at a factor many may not consider: how the amount of stretch in the snatch strap or kinetic rope affects the loads.

Velocity and Deceleration Forces based on Stretch* 

*Assuming 9m snatch strap with a 3m run-up. 0-100 in 10s acceleration. 


We can see here that the amount of stretch in a snatch strap can significantly reduce the maximum force transferred through the strap. Note how the reduction of stretch from 20% to 10% doubles the loads.  

There are other factors to bear in mind too. Straps need time to recover their stretch between loading, and they also lose their properties over time – meaning it pays to ensure your kit is well looked after. 
 
Essentially, more stretch means a greater distance to decelerate over, which means less load.

Putting it All Together in a Real-World Scenario 

You will have noticed that some of these numbers we've found so far exceed the ratings on standard recovery gear. The best way to work out what we can expect in the real world is to explore a typical snatch strap recovery, so let's throw some values at the scenario we discussed earlier.


The Driving Force: 

Sand Recoveries are a typical case for a snatch recovery.  

We know that sand has a friction coefficient of 0.4.  

The stuck vehicle would usually be bogged to at least the rims, corresponding to a resistance load equal to the GVM. 

Most vehicles sit at around 3t. So, let’s say we have a 3t stuck vehicle and a 3t recovery vehicle.  

The Deceleration Force: 

We’ve got a typical snatch strap, at 9m long and 20% stretch, with a minimum breaking strain of 8t. 

Using best practice recovery techniques: the recovery vehicle would have a 3m run up and get to a maximum speed of 15km/h, assuming the vehicle is capable of 0-100km/h in 10s.  

This would result in a deceleration force of 1416kg and stretch the strap 1.8m.  

If the recovery vehicle continues to apply power after it comes to rest, the tractive forces due to friction would add another 1200kg, assuming the friction is 0.4 with sand.  

The Outcome: 

This recovery could generate a theoretical total force of 2616kg, well within the rated capacity of standard recovery gear. 


How this Scenario Could Go Wrong  

So, how can it go wrong? Let’s take nearly the same scenario and see how tweaking a few of the circumstances in a recovery can radically affect the outcome.


The Driving Force: 

Again, let’s use a sand recovery.  

The stuck vehicle is still bogged to at least the rims, corresponding to a resistance load equal to the GVM. 

We have the same 3t stuck vehicle, but in this scenario, we’ll say our recovery vehicle is overloaded or has an above-average GVM, at 4.5t.

The Deceleration Force: 

We’ve got the same snatch strap, at 9m long and 20% stretch, with a minimum breaking strain of 8t. 

But in this scenario, instead of using best practice recovery techniques with an S-bend and 3m run up, let's start the vehicles bumper-to-bumper with a 9m run up. With a maximum speed of 25.5km/h, assuming the vehicle is capable of 0-100km/h in 10s.  

This would result in a deceleration force of 6371kg and stretch the strap 1.8m.  

If the recovery vehicle continues to apply power after it comes to rest, the tractive forces due to friction would add another 1800kg, assuming the friction is 0.4 with sand.  

The Outcome: 

This recovery could generate a theoretical total force of 8171kg, well over the rated capacity of standard recovery gear. 


We can ascertain from this that we could break a strap, and whilst it is still within the safety factors of the recovery points and the shackles, it's well above common WLL ratings. 

A more enthusiastic second attempt with less stretch could potentially double this load again, easily soaring over 12,000kg.  

You’ll see it only takes a few factors – a heavier vehicle, and poorer technique – for the loads to climb above recommended limits. This is when we see failures occur. At this end of the scale, you’re potentially going to break the strap, or even your recovery point.

What We Can Learn From This 

At its core, we can see that increasing forces in a recovery comes down to three main things: more mass, more speed and less stretch. Friction and tractive driving force from the vehicle are also contributing factors we should not overlook. 

It’s good to understand what conditions can cause loads to exceed the rated capacity or breaking strain of your recovery gear. Things like reduced stretch due to multiple attempts or a large run-up could see loads total loads over 10t. Understanding these factors also helps us know how to significantly reduce peak loads in the recovery train, particularly through snatch straps that provide more stretch. Not to mention reducing the speed of recovery, proving that, where possible, a slower, steadier recovery is best. 

In recoveries-gone-wrong, you’re most likely to see a strap break, or worse: a recovery point. It’s bad enough to have a snatch strap break, but it's actually the least dangerous situation. Break a recovery point, and you have not only a strap flying through the air, but a shackle and a recovery point too. 

This is why it's crucial to have a recovery point with an adequate rating for your vehicle. If your point has a WLL of just 3.5t, and has been tested to a safety factor of 2, there is the chance that your recovery point could break with a mere 7t of force. We’ve seen already that it doesn’t take much to exceed that. 

But perhaps the most important takeaway from this exercise: it’s good to know if you take a little time to select appropriately rated gear for your vehicle and use it correctly in a typical situation, you’ll be just fine.

  • Facebook
  • Twitter
  • Pinterest

NEWER POSTS

Leave a comment

Comments have to be approved before showing up

OLDER POSTS

Join Our Newsletter for 5% Off

Sign up to become part of the #kaonconvoy and receive 5% off your first order, plus be the first
to know about new product releases, exclusive offers, and to hear about our latest adventures.

We’re here to help.

Found yourself off-track? Our team is on hand to help you get unstuck.

EMAIL US EMAIL US
info@KAON.com.au

TALK TO OUR TEAM

  • (07) 3180 1470
  • M-Th – 7am-3:30pm
    Fri – 7am-12pm

OUR OFFICE

  • 2 Antimony Street, CAROLE PARK, QLD, 4300, AU

  • HELPFUL LINKS

    • Shipping
    • Returns

    Keep Exploring

    Our mission is simple: to give adventurous spirits the confidence to enrich their lives by exploring and connecting with the outdoors.

    HELPFUL LINKS

    • Stockists
    • Shipping
    • Returns
    • My Account
    • Privacy Policy
    KAON 4x4 Touring Accessories Footer Logo
    • SHOP BY CATEGORY

    • 4x4 Storage
    • Protection
    • Recovery
    • Brackets & Mounts
    • Camping
    • Engine & Performance
    • Merch
    • Gift Cards
    • POPULAR VEHICLES

    • Toyota Prado 150 2009-2024
    • Toyota Fortuner
    • Toyota FJ Cruiser
    • Toyota HiLux
    • Toyota LandCruiser LC300 2021-present
    • Toyota LandCruiser LC200 2007-2021
    • Toyota LandCruiser LC100 1998-2007
    • Toyota LandCruiser LC76 2007-present
    • EXPLORE

    • ABOUT US

    • CONTACT & HELP

    • Privacy Policy
    • Terms & Conditions

    Copyright © 2025 KAON 4x4 Touring Accessories. All rights reserved.

    Terms & Conditions

    Welcome to our website. If you continue to browse and use this website, you are agreeing to comply with and be bound by the following terms and conditions of use, which together with our privacy policy govern KAON 4x4 Touring Accessories’s relationship with you in relation to this website. If you disagree with any part of these terms and conditions, please do not use our website.

    The term ‘KAON 4x4 Touring Accessories’ or ‘us’ or ‘we’ refers to the owner of the website whose registered office is 2 Antimony Street, CAROLE PARK, QLD, 4300, AU. Our ABN is 88663520134. The term ‘you’ refers to the user or viewer of our website.

    The use of this website is subject to the following terms of use:

    • The content of the pages of this website is for your general information and use only. It is subject to change without notice.
    • Neither we nor any third parties provide any warranty or guarantee as to the accuracy, timeliness, performance, completeness or suitability of the information and materials found or offered on this website for any particular purpose. You acknowledge that such information and materials may contain inaccuracies or errors and we expressly exclude liability for any such inaccuracies or errors to the fullest extent permitted by law.
    • Your use of any information or materials on this website is entirely at your own risk, for which we shall not be liable. It shall be your own responsibility to ensure that any products, services or information available through this website meet your specific requirements.
    • This website contains material which is owned by or licensed to us. This material includes, but is not limited to, the design, layout, look, appearance and graphics. Reproduction is prohibited other than in accordance with the copyright notice, which forms part of these terms and conditions.
    • All trademarks reproduced in this website, which are not the property of, or licensed to the operator, are acknowledged on the website.
    • Unauthorised use of this website may give rise to a claim for damages and/or be a criminal offence.
    • From time to time, this website may also include links to other websites. These links are provided for your convenience to provide further information. They do not signify that we endorse the website(s). We have no responsibility for the content of the linked website(s).
    • Your use of this website and any dispute arising out of such use of the website is subject to the laws of Australia.

    Privacy Policy

    This privacy policy sets out how we uses and protects any information that you give us when you use this website.
    We are committed to ensuring that your privacy is protected. Should we ask you to provide certain information by which you can be identified when using this website, then you can be assured that it will only be used in accordance with this privacy statement.
    We may change this policy from time to time by updating this page. You should check this page from time to time to ensure that you are happy with any changes.

    What we collect
    We may collect the following information:

    • name and job title
    • contact information including email address
    • demographic information such as postcode, preferences and interests
    • other information relevant to customer surveys and/or offers
    • What we do with the information we gather

    We require this information to understand your needs and provide you with a better service, and in particular for the following reasons:

    Internal record keeping

    • We may use the information to improve our products and services.
    • We may periodically send promotional emails about new products, special offers or other information which we think you may find interesting using the email address which you have provided.
    • From time to time, we may also use your information to contact you for market research purposes. We may contact you by email, phone, fax or mail. We may use the information to customise the website according to your interests.

    Security

    We are committed to ensuring that your information is secure. In order to prevent unauthorised access or disclosure, we have put in place suitable physical, electronic and managerial procedures to safeguard and secure the information we collect online.

    How we use cookies

    A cookie is a small file which asks permission to be placed on your computer's hard drive. Once you agree, the file is added and the cookie helps analyse web traffic or lets you know when you visit a particular site. Cookies allow web applications to respond to you as an individual. The web application can tailor its operations to your needs, likes and dislikes by gathering and remembering information about your preferences.
    We use traffic log cookies to identify which pages are being used. This helps us analyse data about webpage traffic and improve our website in order to tailor it to customer needs. We only use this information for statistical analysis purposes and then the data is removed from the system.
    Overall, cookies help us provide you with a better website by enabling us to monitor which pages you find useful and which you do not. A cookie in no way gives us access to your computer or any information about you, other than the data you choose to share with us.
    You can choose to accept or decline cookies. Most web browsers automatically accept cookies, but you can usually modify your browser setting to decline cookies if you prefer. This may prevent you from taking full advantage of the website.

    Links to other websites

    Our website may contain links to other websites of interest. However, once you have used these links to leave our site, you should note that we do not have any control over that other website. Therefore, we cannot be responsible for the protection and privacy of any information which you provide whilst visiting such sites and such sites are not governed by this privacy statement. You should exercise caution and look at the privacy statement applicable to the website in question.

    Controlling your personal information
    You may choose to restrict the collection or use of your personal information in the following ways:

    • whenever you are asked to fill in a form on the website, look for the box that you can click to indicate that you do not want the information to be used by anybody for direct marketing purposes
    • if you have previously agreed to us using your personal information for direct marketing purposes, you may change your mind at any time by writing to or emailing us.

    We will not sell, distribute or lease your personal information to third parties unless we have your permission or are required by law to do so. We may use your personal information to send you promotional information about third parties which we think you may find interesting if you tell us that you wish this to happen.
    If you believe that any information we are holding on you is incorrect or incomplete, please write to or email us as soon as possible at the above address. We will promptly correct any information found to be incorrect.

    Afterpay

    Shop Now. Pay Later.
    Always interest-free.

    Add your favourites to cart

    Select Afterpay at checkout

    Log into or create your Afterpay account, with instant approval decision

    Your purchase will be split into 4 payments, payable every 2 weeks

    All you need to apply is to have a debit or credit card, to be over 18 years of age, and to be a resident of country offering Afterpay

    Late fees and additional eligibility criteria apply. The first payment may be due at the time of purchase
    For complete terms visit afterpay.com/terms